
서론

Jetson Nano에서 MobileNetV2의 GPU가속을 사용한 성능을 비교 측정하기 위해 TensorRT를 사용한다. 그리고 Inference time을 측정하기 위한 환경셋팅과 방법을 소개한다. 중요한 것은
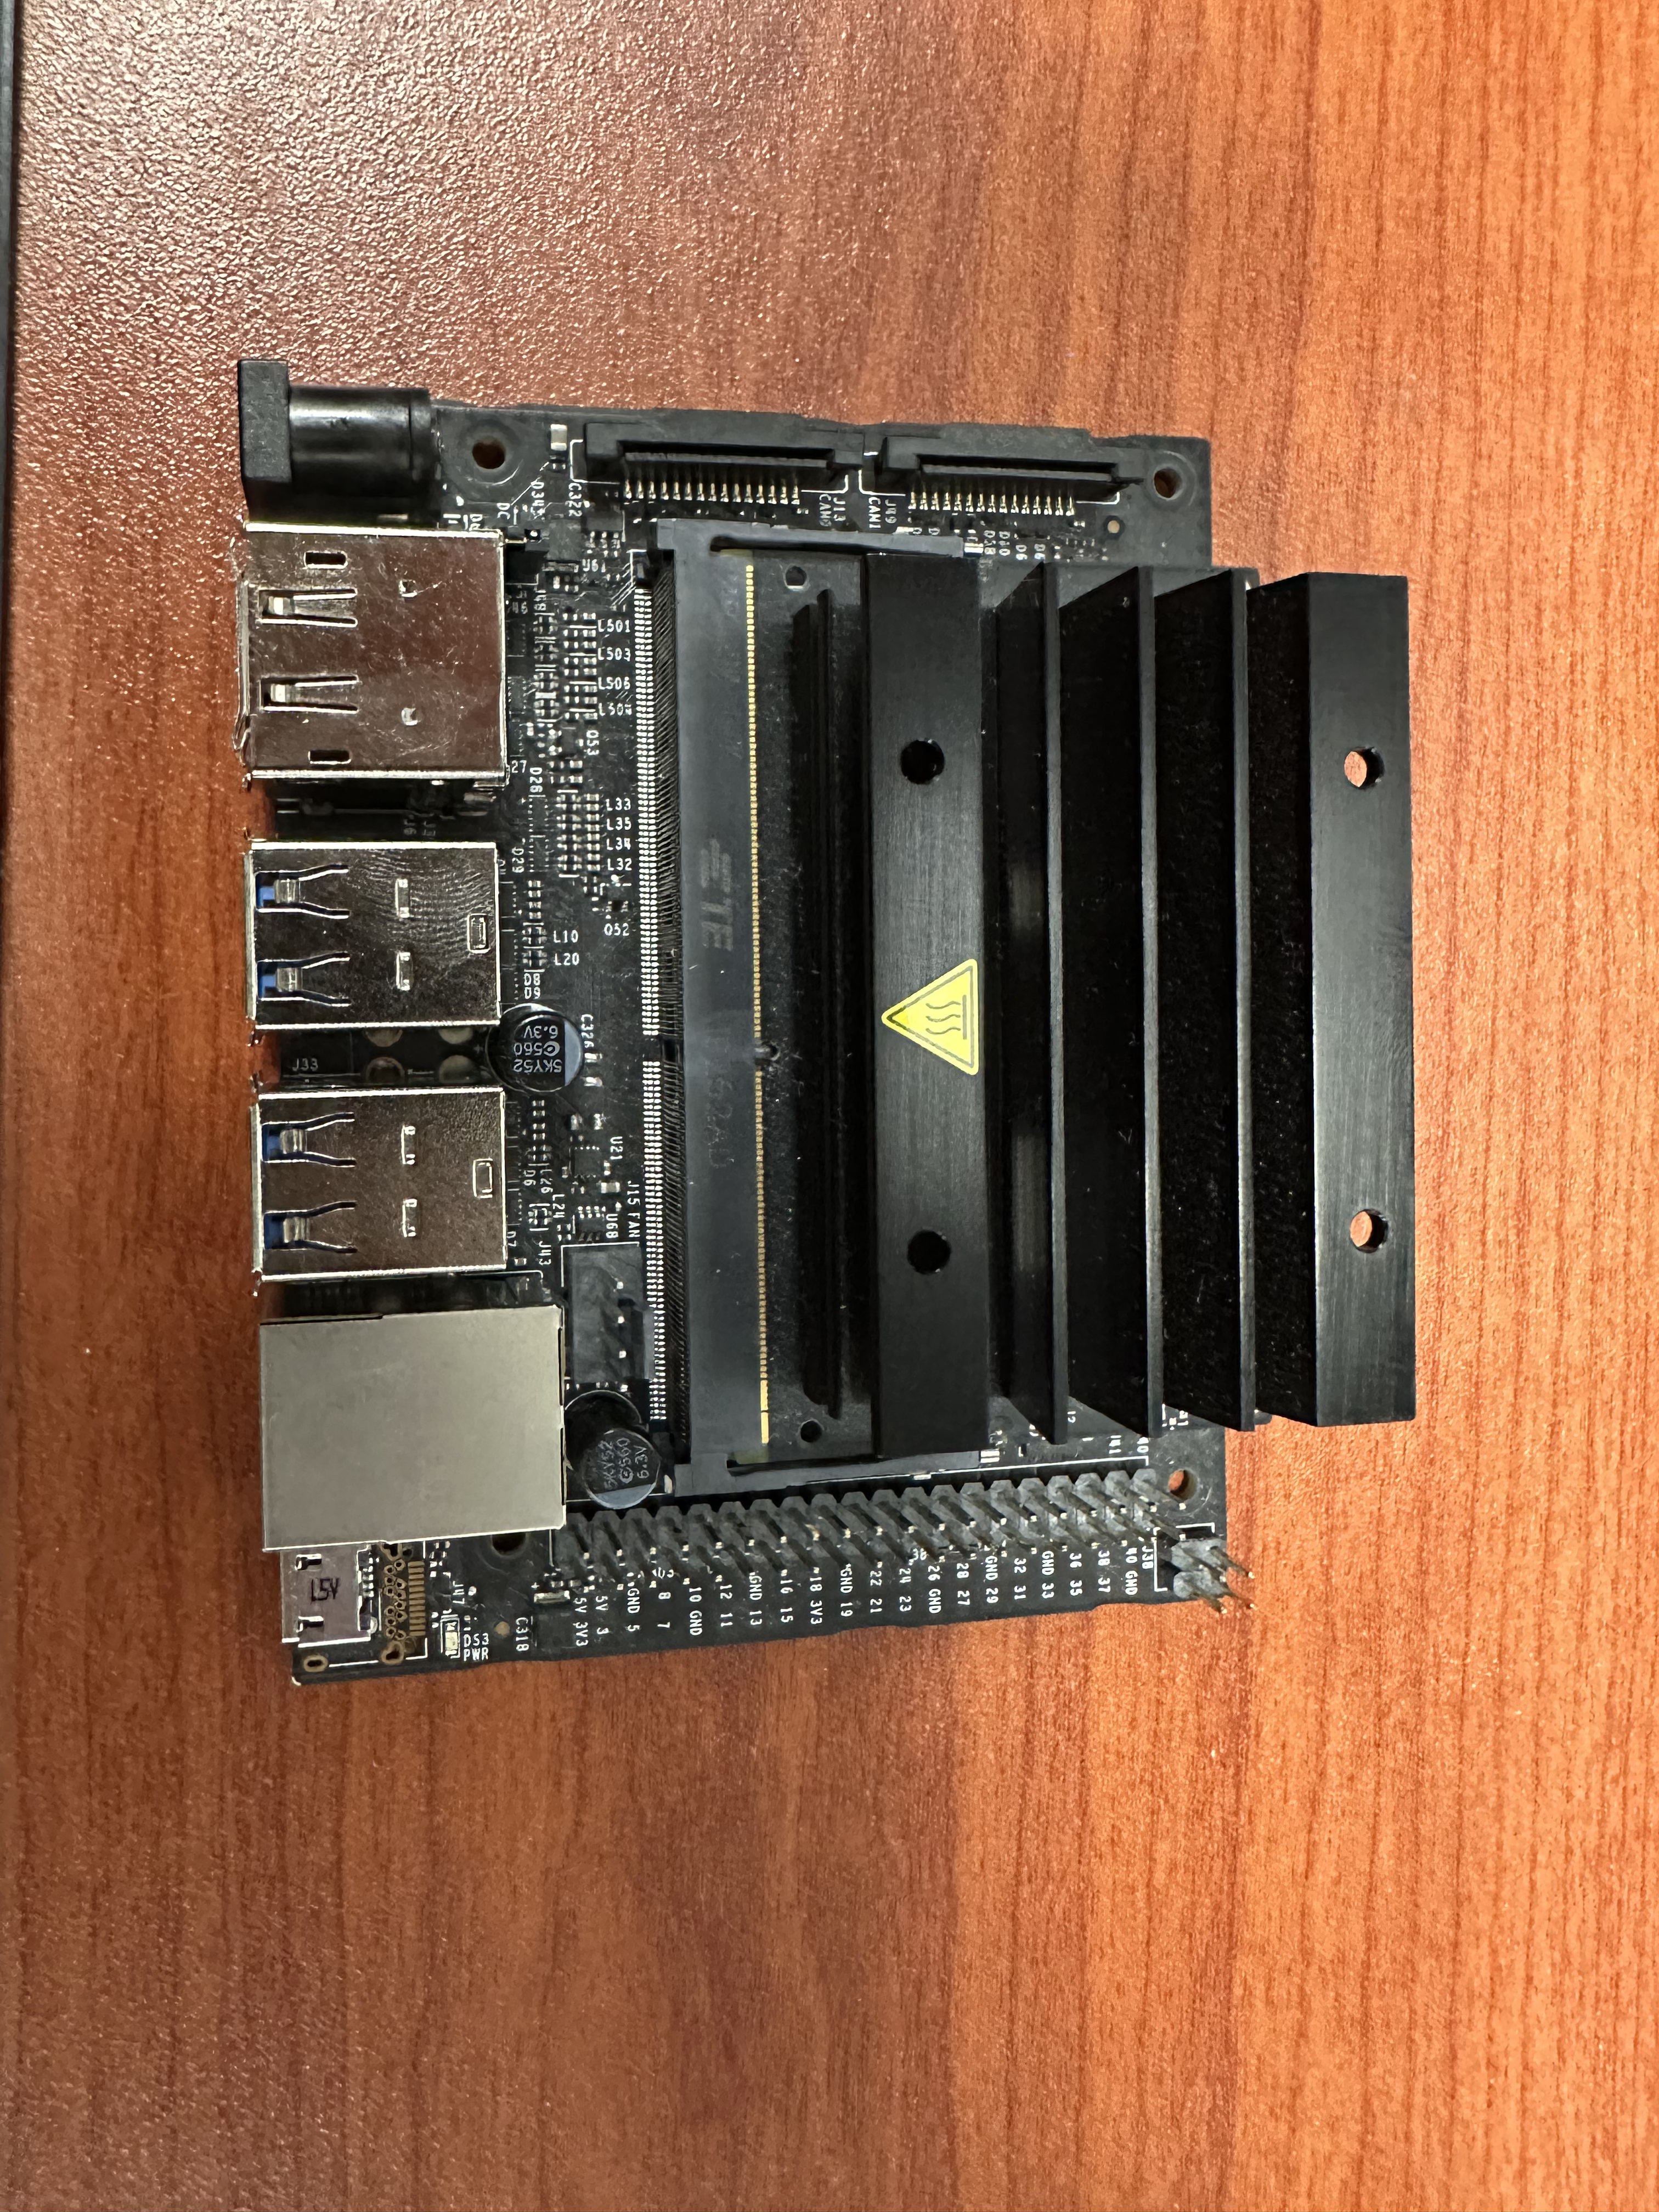
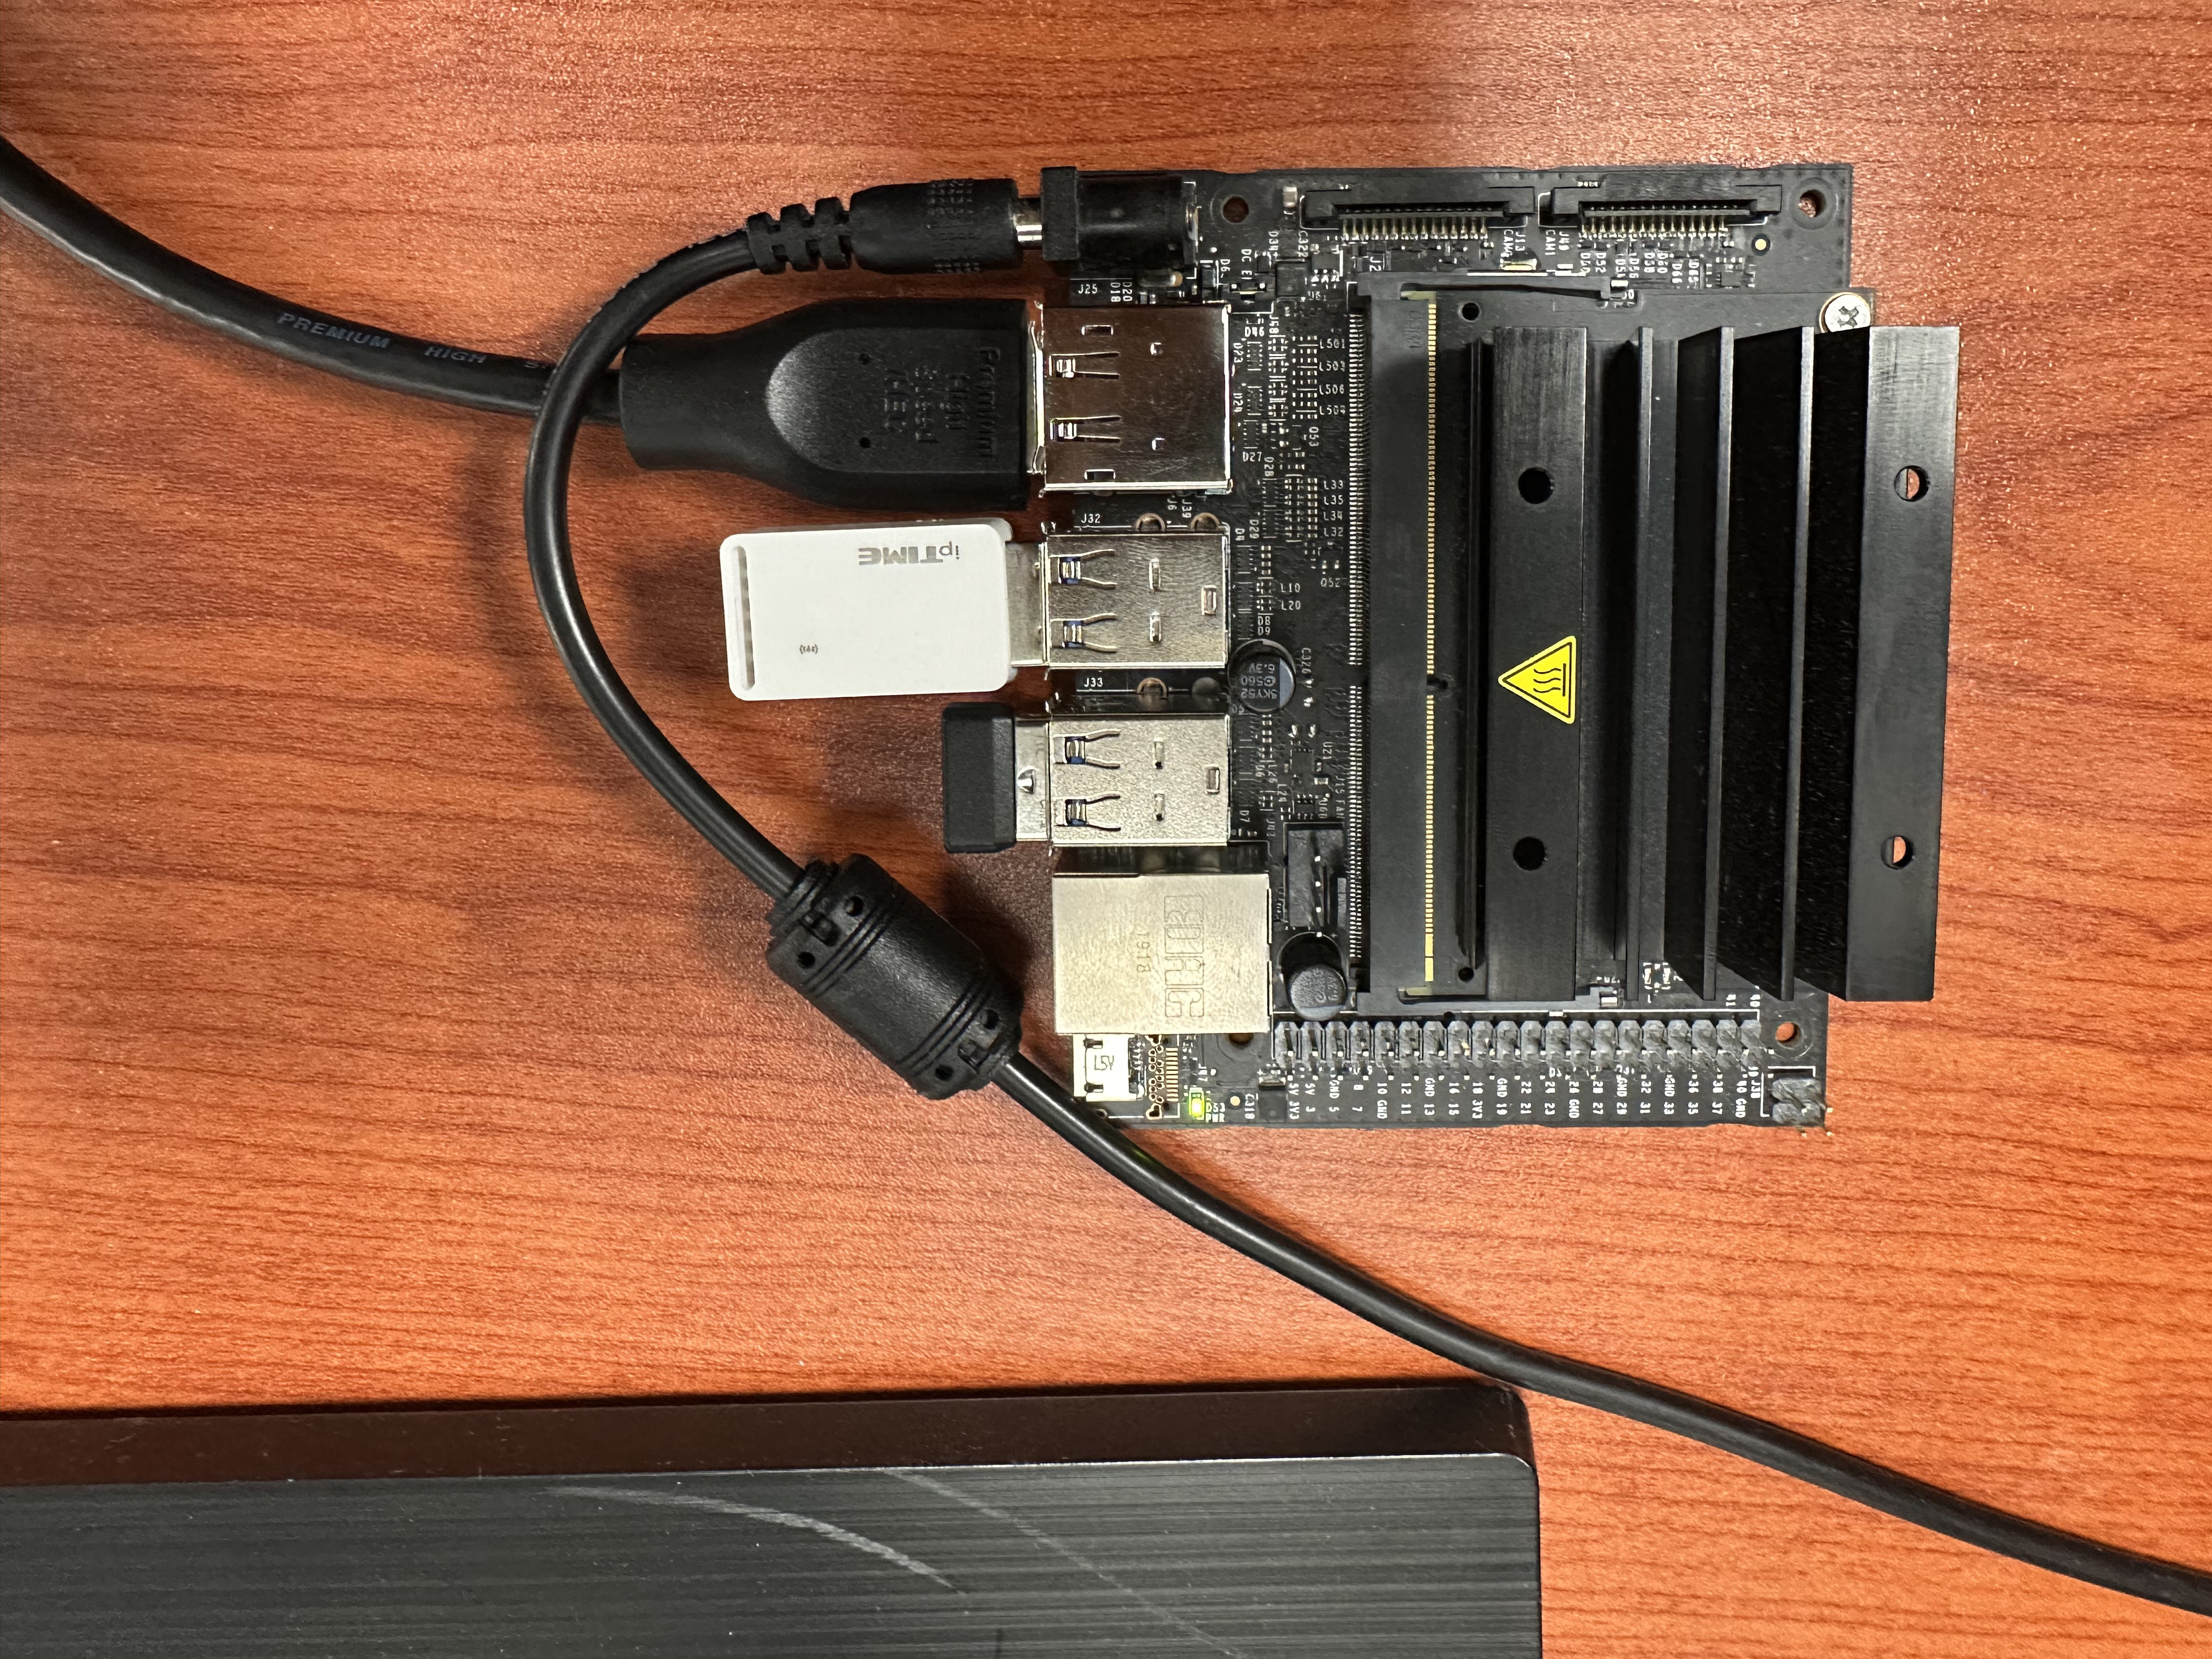
사용한 보드는 JetsonNano XT1이다.
목차
1. About Jetson Nano
Jetson Nano는 Navidia에서 그래픽 칩을 넣어 만든 Raspberry PI와 같이 개발자용 소형 컴퓨터이다.
Jetson Nano에서 Nvidia에서 제공하는 SDK(소프트웨어 개발 키트)인 JetPack을 설치해 개발환경을 만들 수 있다.
2. JetPack 설치하기
먼저 아래 Nvidia공식 홈페이지에서 본인의 보드와 맞는 JetPack을 설치한다.
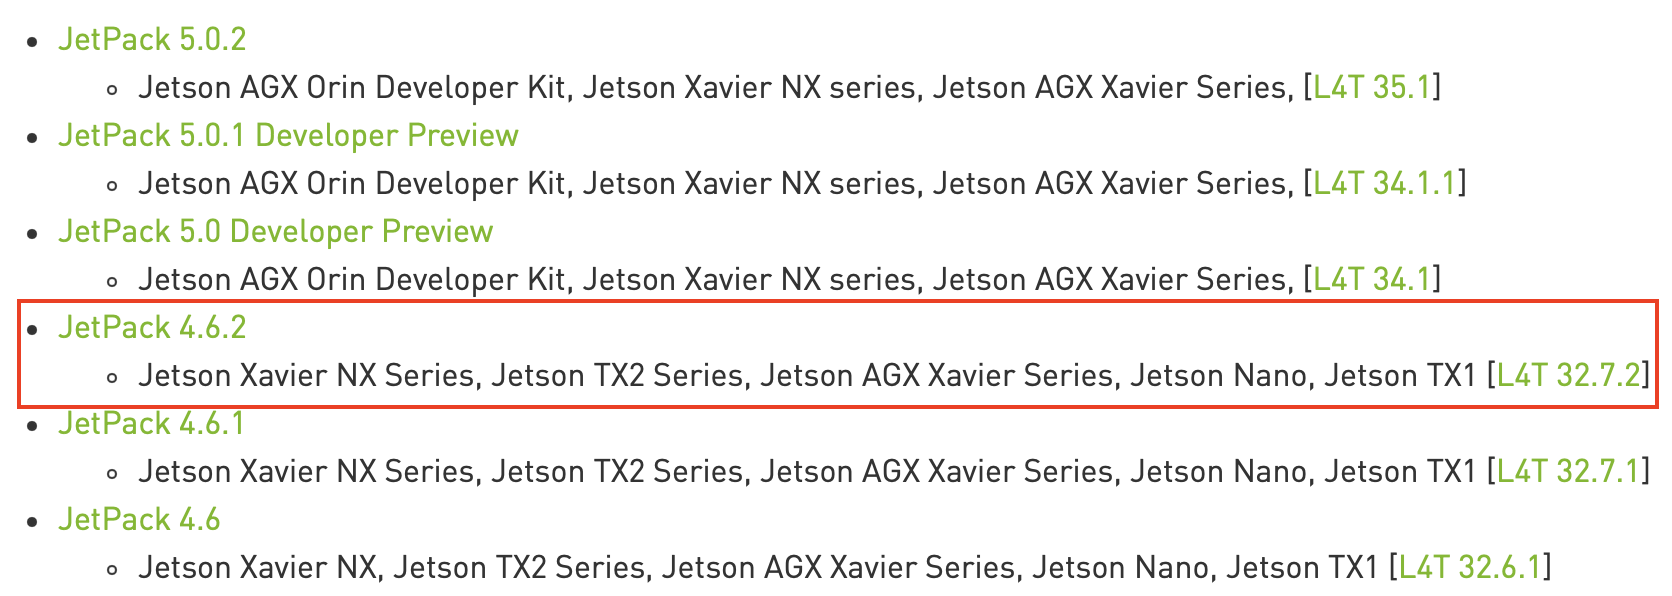
나는 TX1 모델이기 때문에 4.6.2를 설치했다. [L4T 32.7.2]를 눌러준다. 참고로 해당 버전은 자동으로 Ubuntu 18.04 LTS버전이 깔리게 된다.
https://developer.nvidia.com/embedded/jetpack-archive
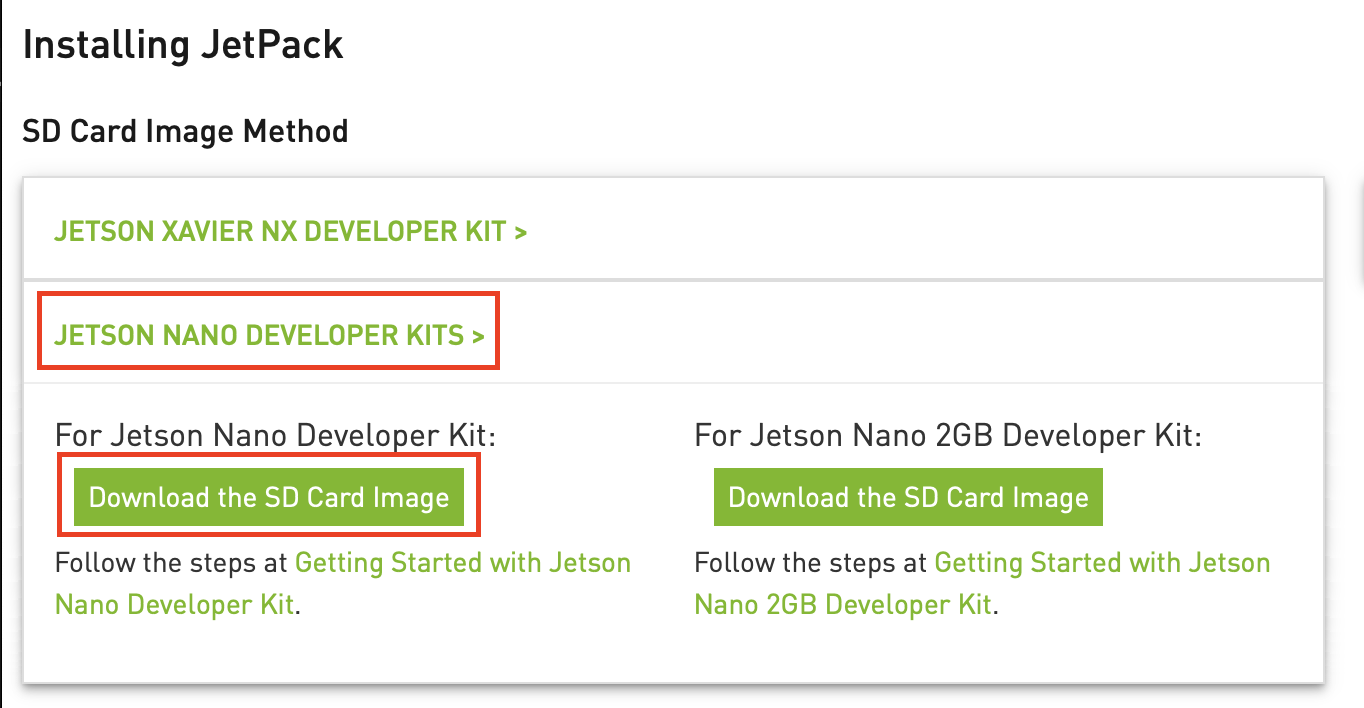
그럼 아래와 같은 페이지가 뜨는데 본인의 RAM용량을 확인 후 맞는 SDK를 다운 받는다.
Jetson Nano는 따로 내부 저장소가 없기 때문에 해당 이미지를 SD Card fetching해 주어야 한다. 본인은 64GB를 사용했으며 최소 32GB이상을 권장한다.
다운이 완료되면 fetcing하기 위한 fetcher가 필요한데 아래 balenaEtcher를 통해 sd card굽는다.
다운받은 이미지 파일을 sd card를 선택하고 Fetch해준다. 그리고 sd card를 jetson Nano에 꼽고 부팅한다.


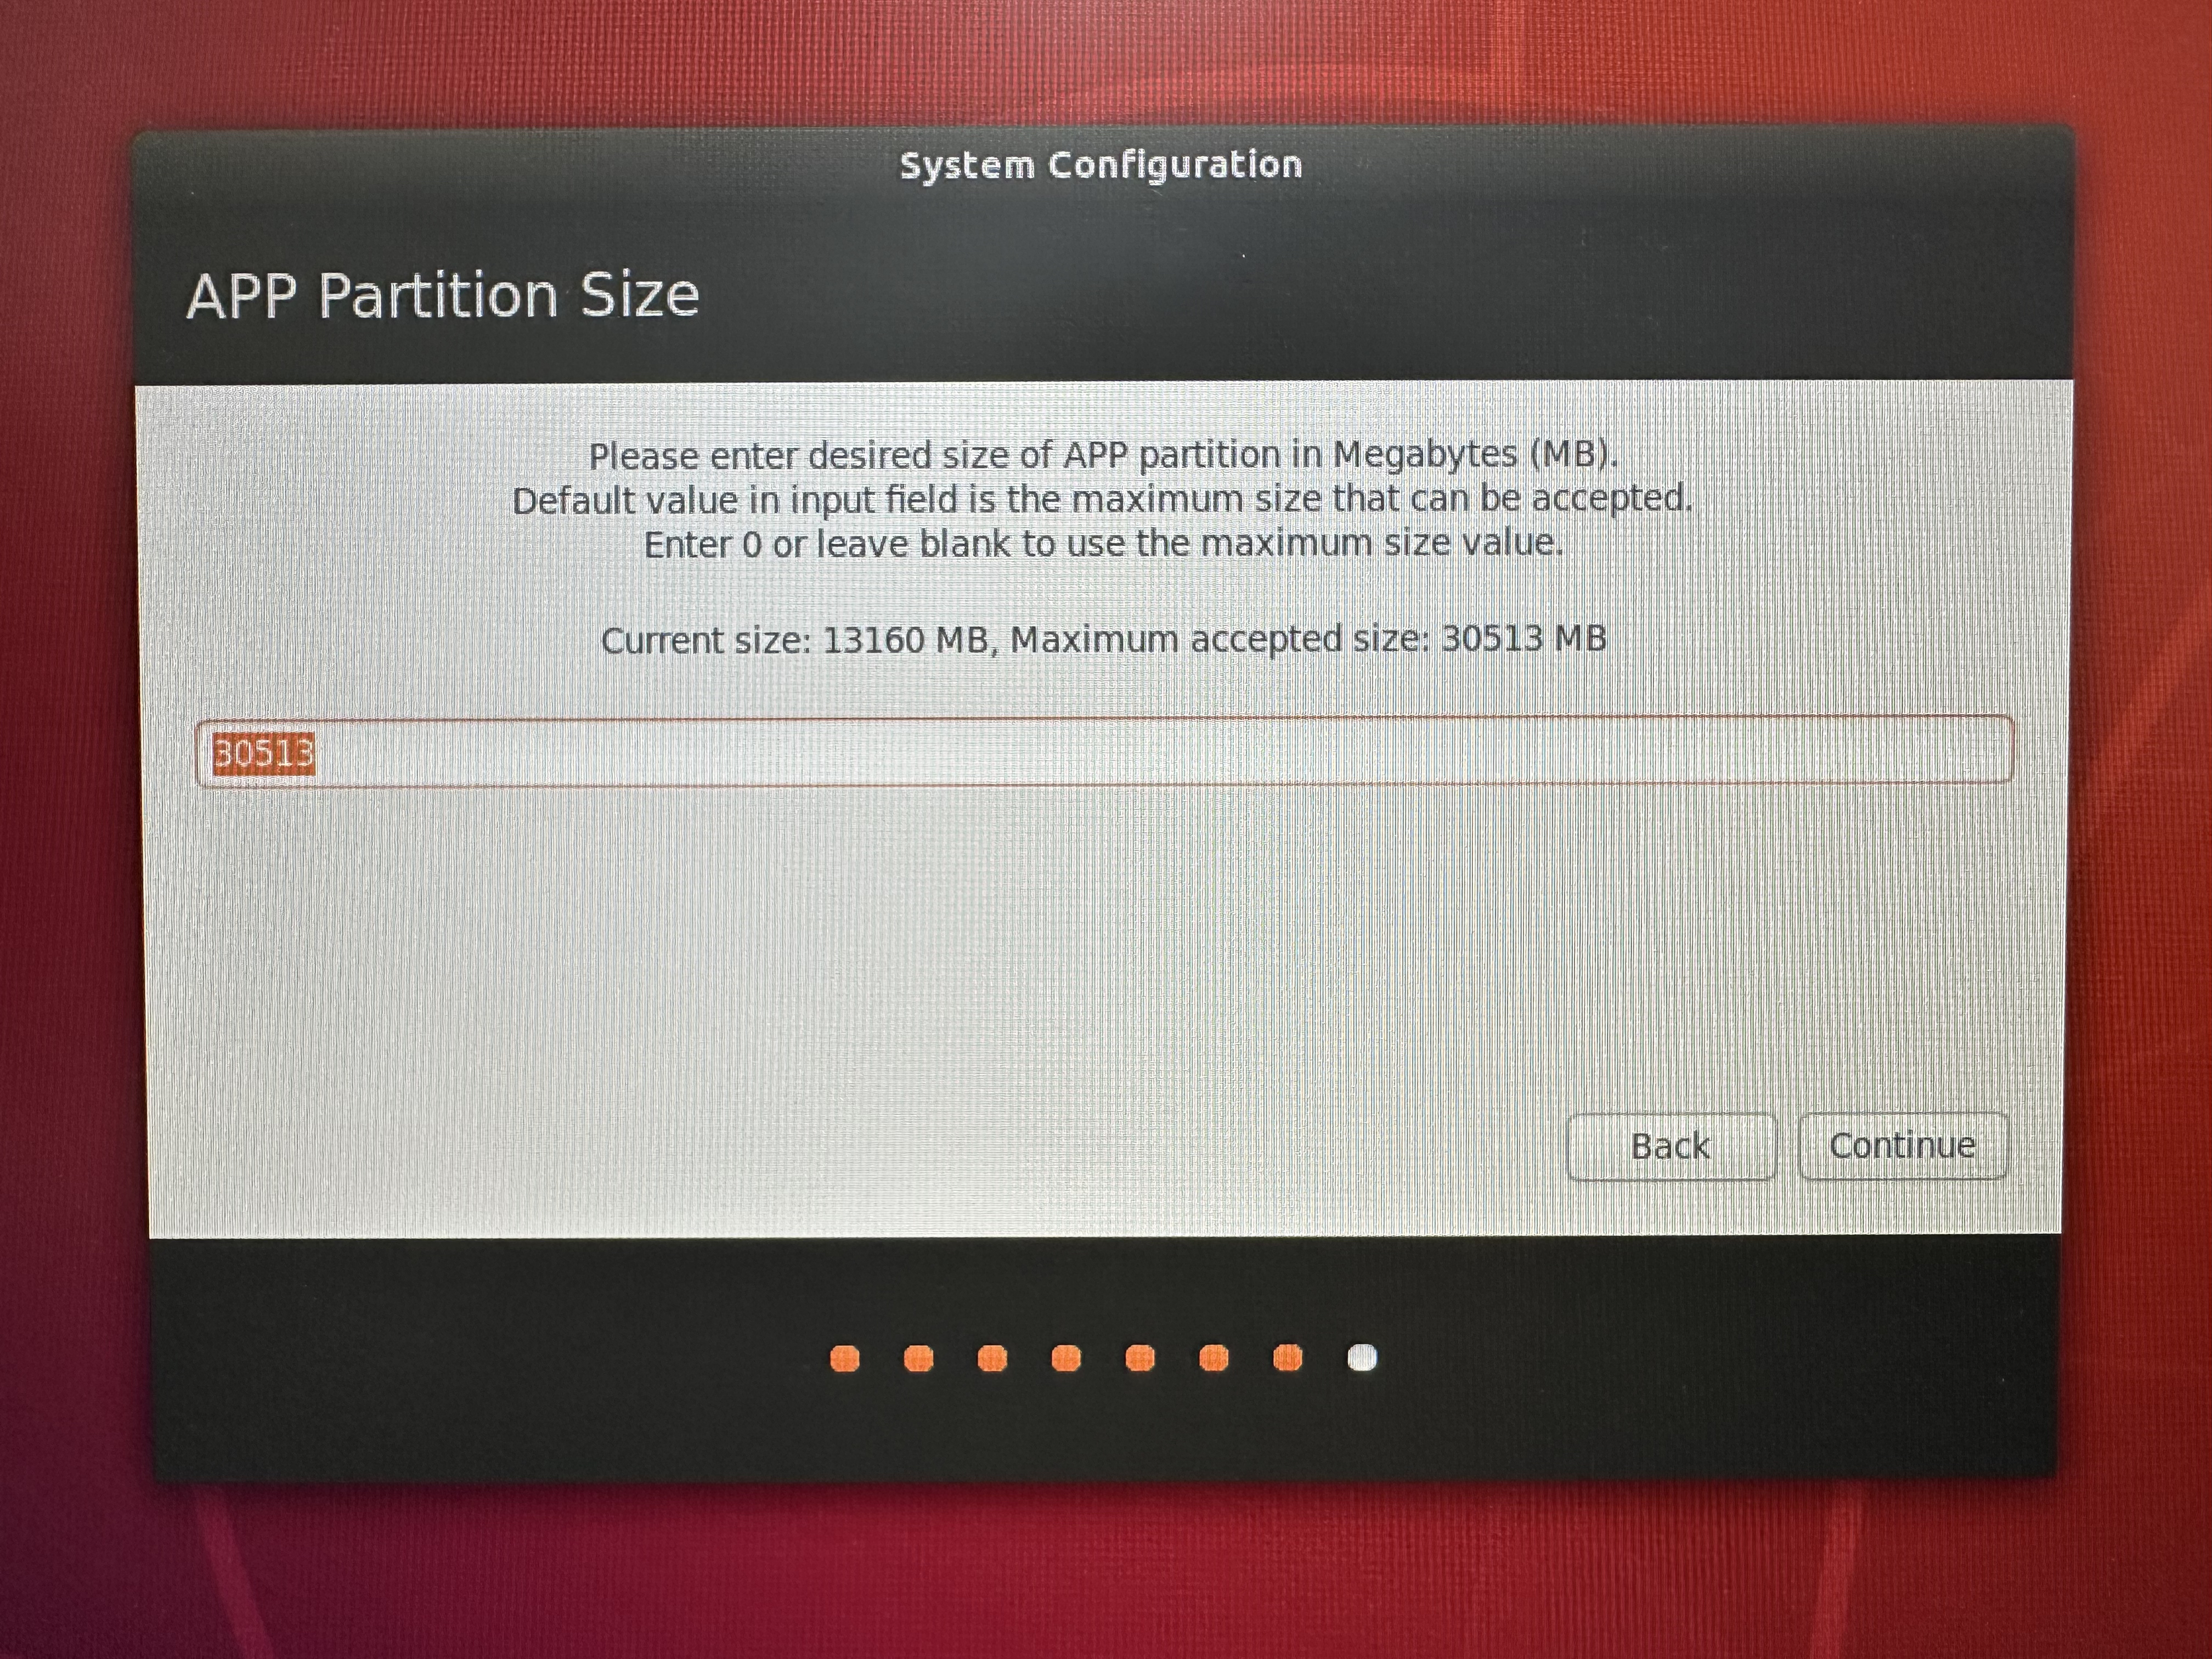
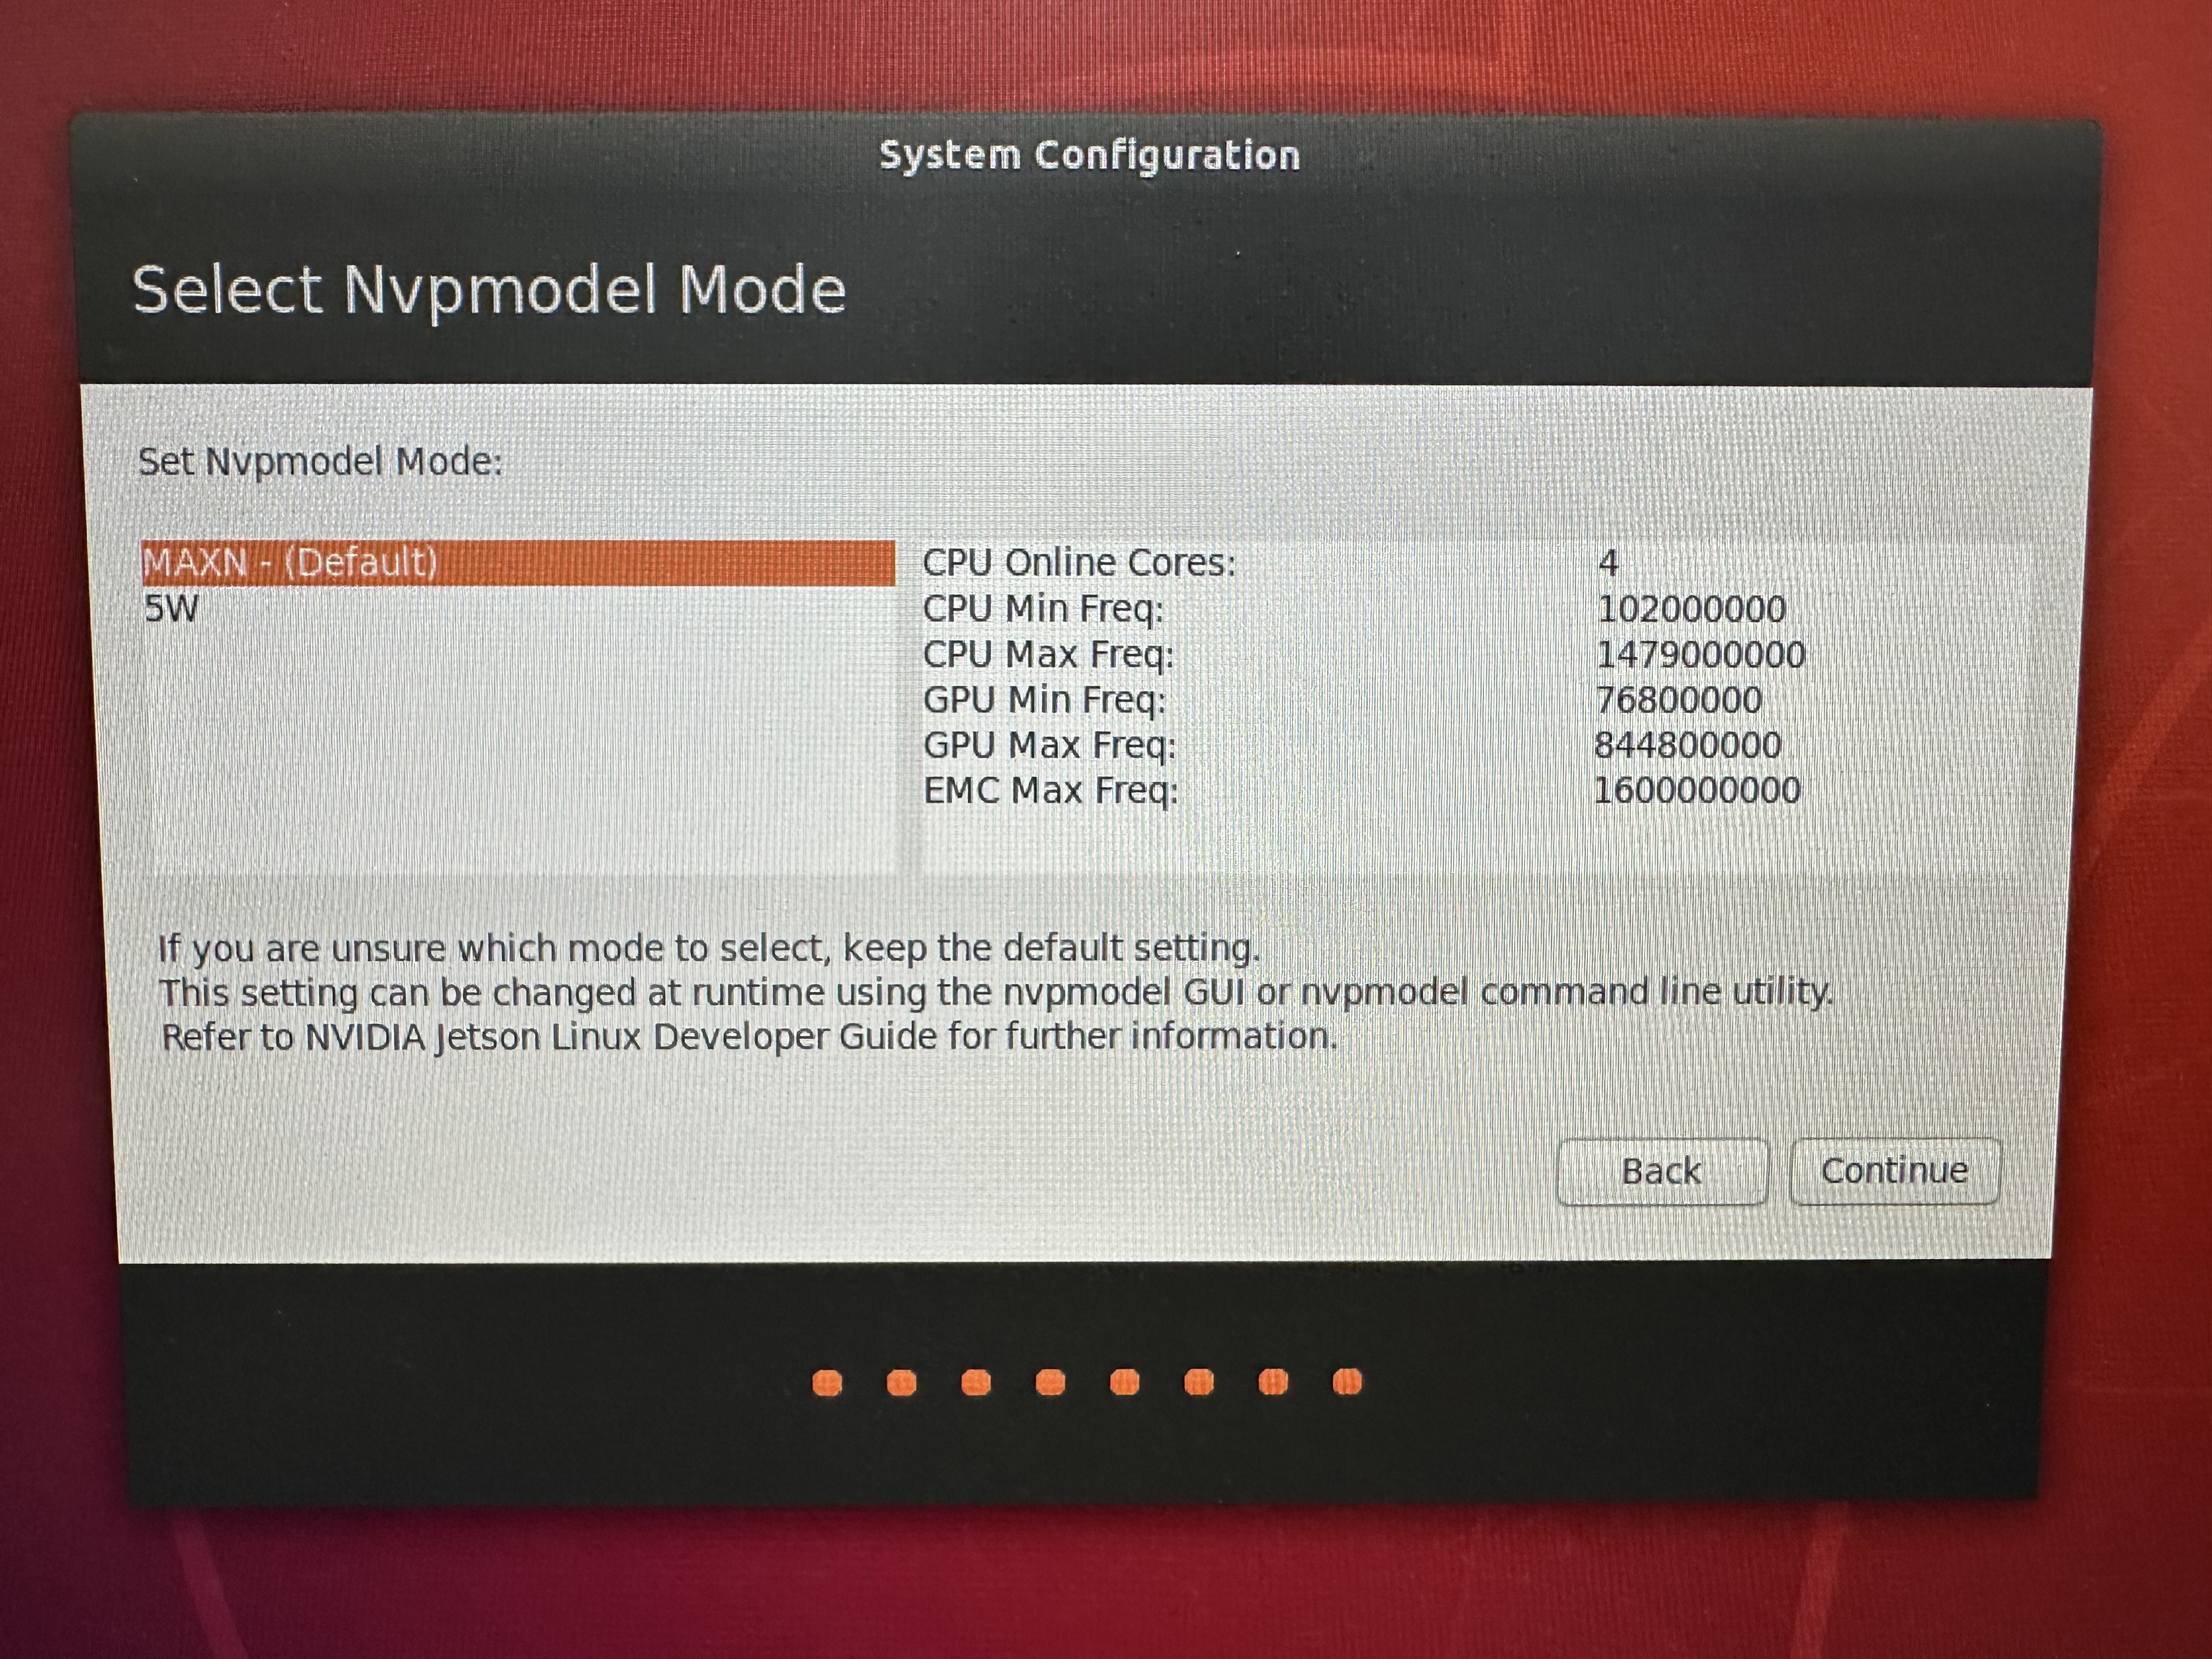
설치를 해주고 아래처럼 자원을 최대한 많이 할당한다. 이렇게 해도 사실 느리다.
3. Linux Ubuntu Setting
먼저 아키텍처와 파이썬 버전을 확인하자.
jet@jet-desktop:~$ uname -m # arrch64
jet@jet-desktop:~$ python -V # Python 2.7.17
jet@jet-desktop:~$ python3 -V # python 3.6.9
MobileNetV2를 inference 하기 위해 필요한 패키지들을 설치해야 한다.
아래 공식 홈페이지에서 본인이 설치한 Jetpack버전에 맞는 패키지들을 설치해주자.
나는 아래 패키지들만 설치했다.
$ sudo apt-get update

# install prerequisites
$ sudo apt-get install libhdf5-serial-dev hdf5-tools libhdf5-dev zlib1g-dev zip libjpeg8-dev liblapack-dev libblas-dev gfortran

# install and upgrade pip3
$ sudo apt-get install python3-pip
$ sudo pip3 install -U pip testresources setuptools==49.6.0

# install the following python packages
$ sudo pip3 install -U numpy==1.19.4 future==0.18.2 mock==3.0.5 h5py==2.10.0 keras_preprocessing==1.1.1 keras_applications==1.0.8 gast==0.2.2 futures protobuf pybind11

# or install the latest version of TensorFlow (2.x) for JetPack 4.6:
$ sudo pip3 install --pre --extra-index-url https://developer.download.nvidia.com/compute/redist/jp/v46 tensorflowInstall VScode
다음에는 VSCODE를 설치하자.
아래 링크에 들어가서 .deb로 된 파일을 다운받자
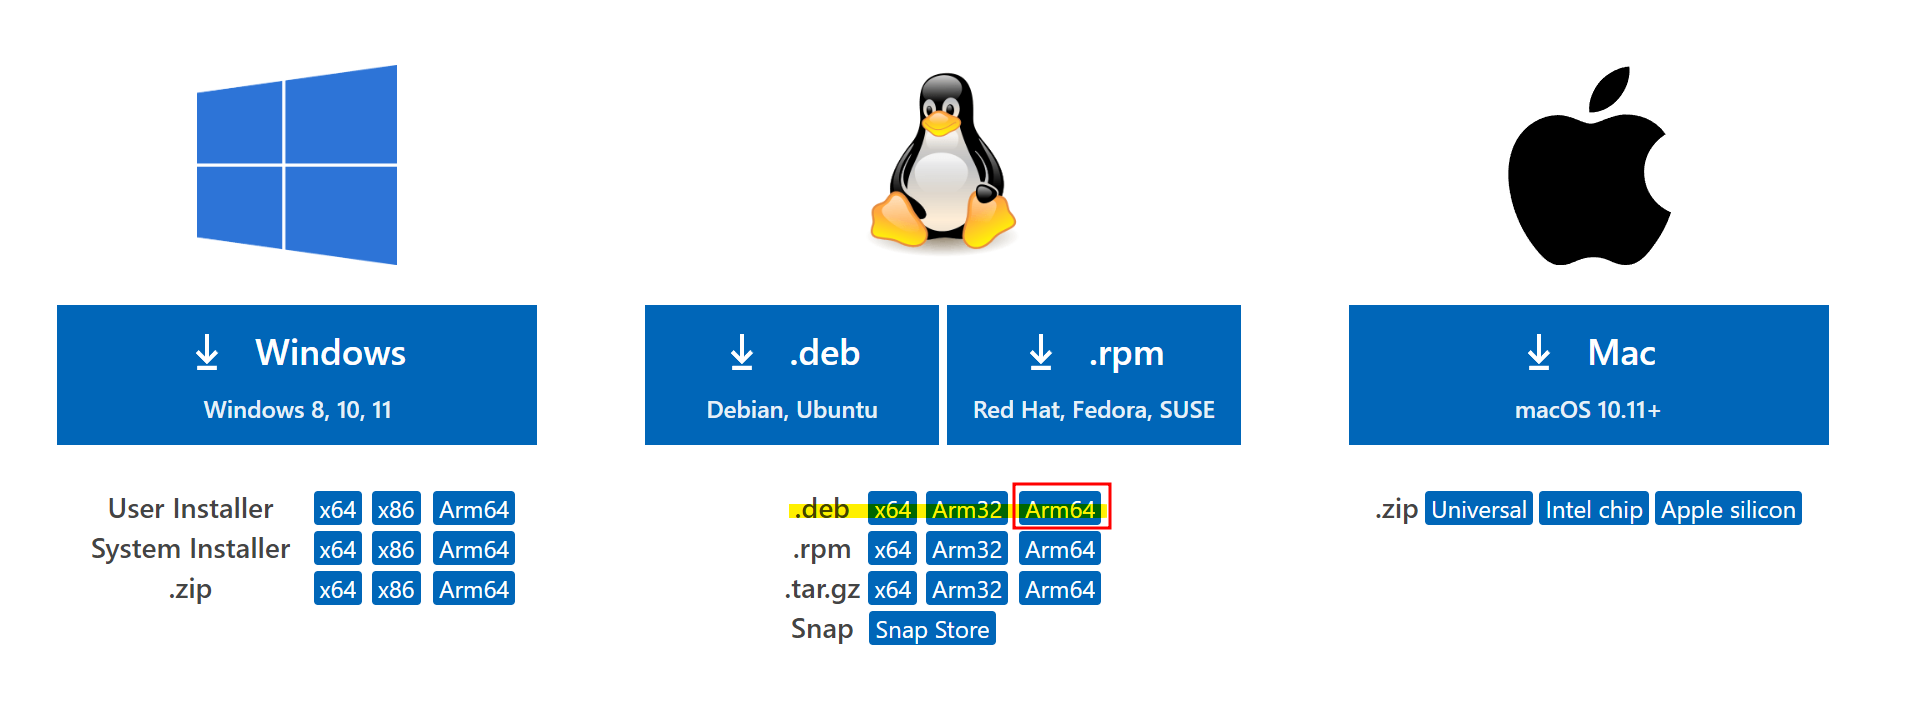
https://code.visualstudio.com/Download
아래 명렁어로 vscode를 설치한다.
jet@jet-desktop:~$ cd Donwloads
jet@jet-desktop:~$ sudo dpkg -i fileName.deb
Install PyCuda
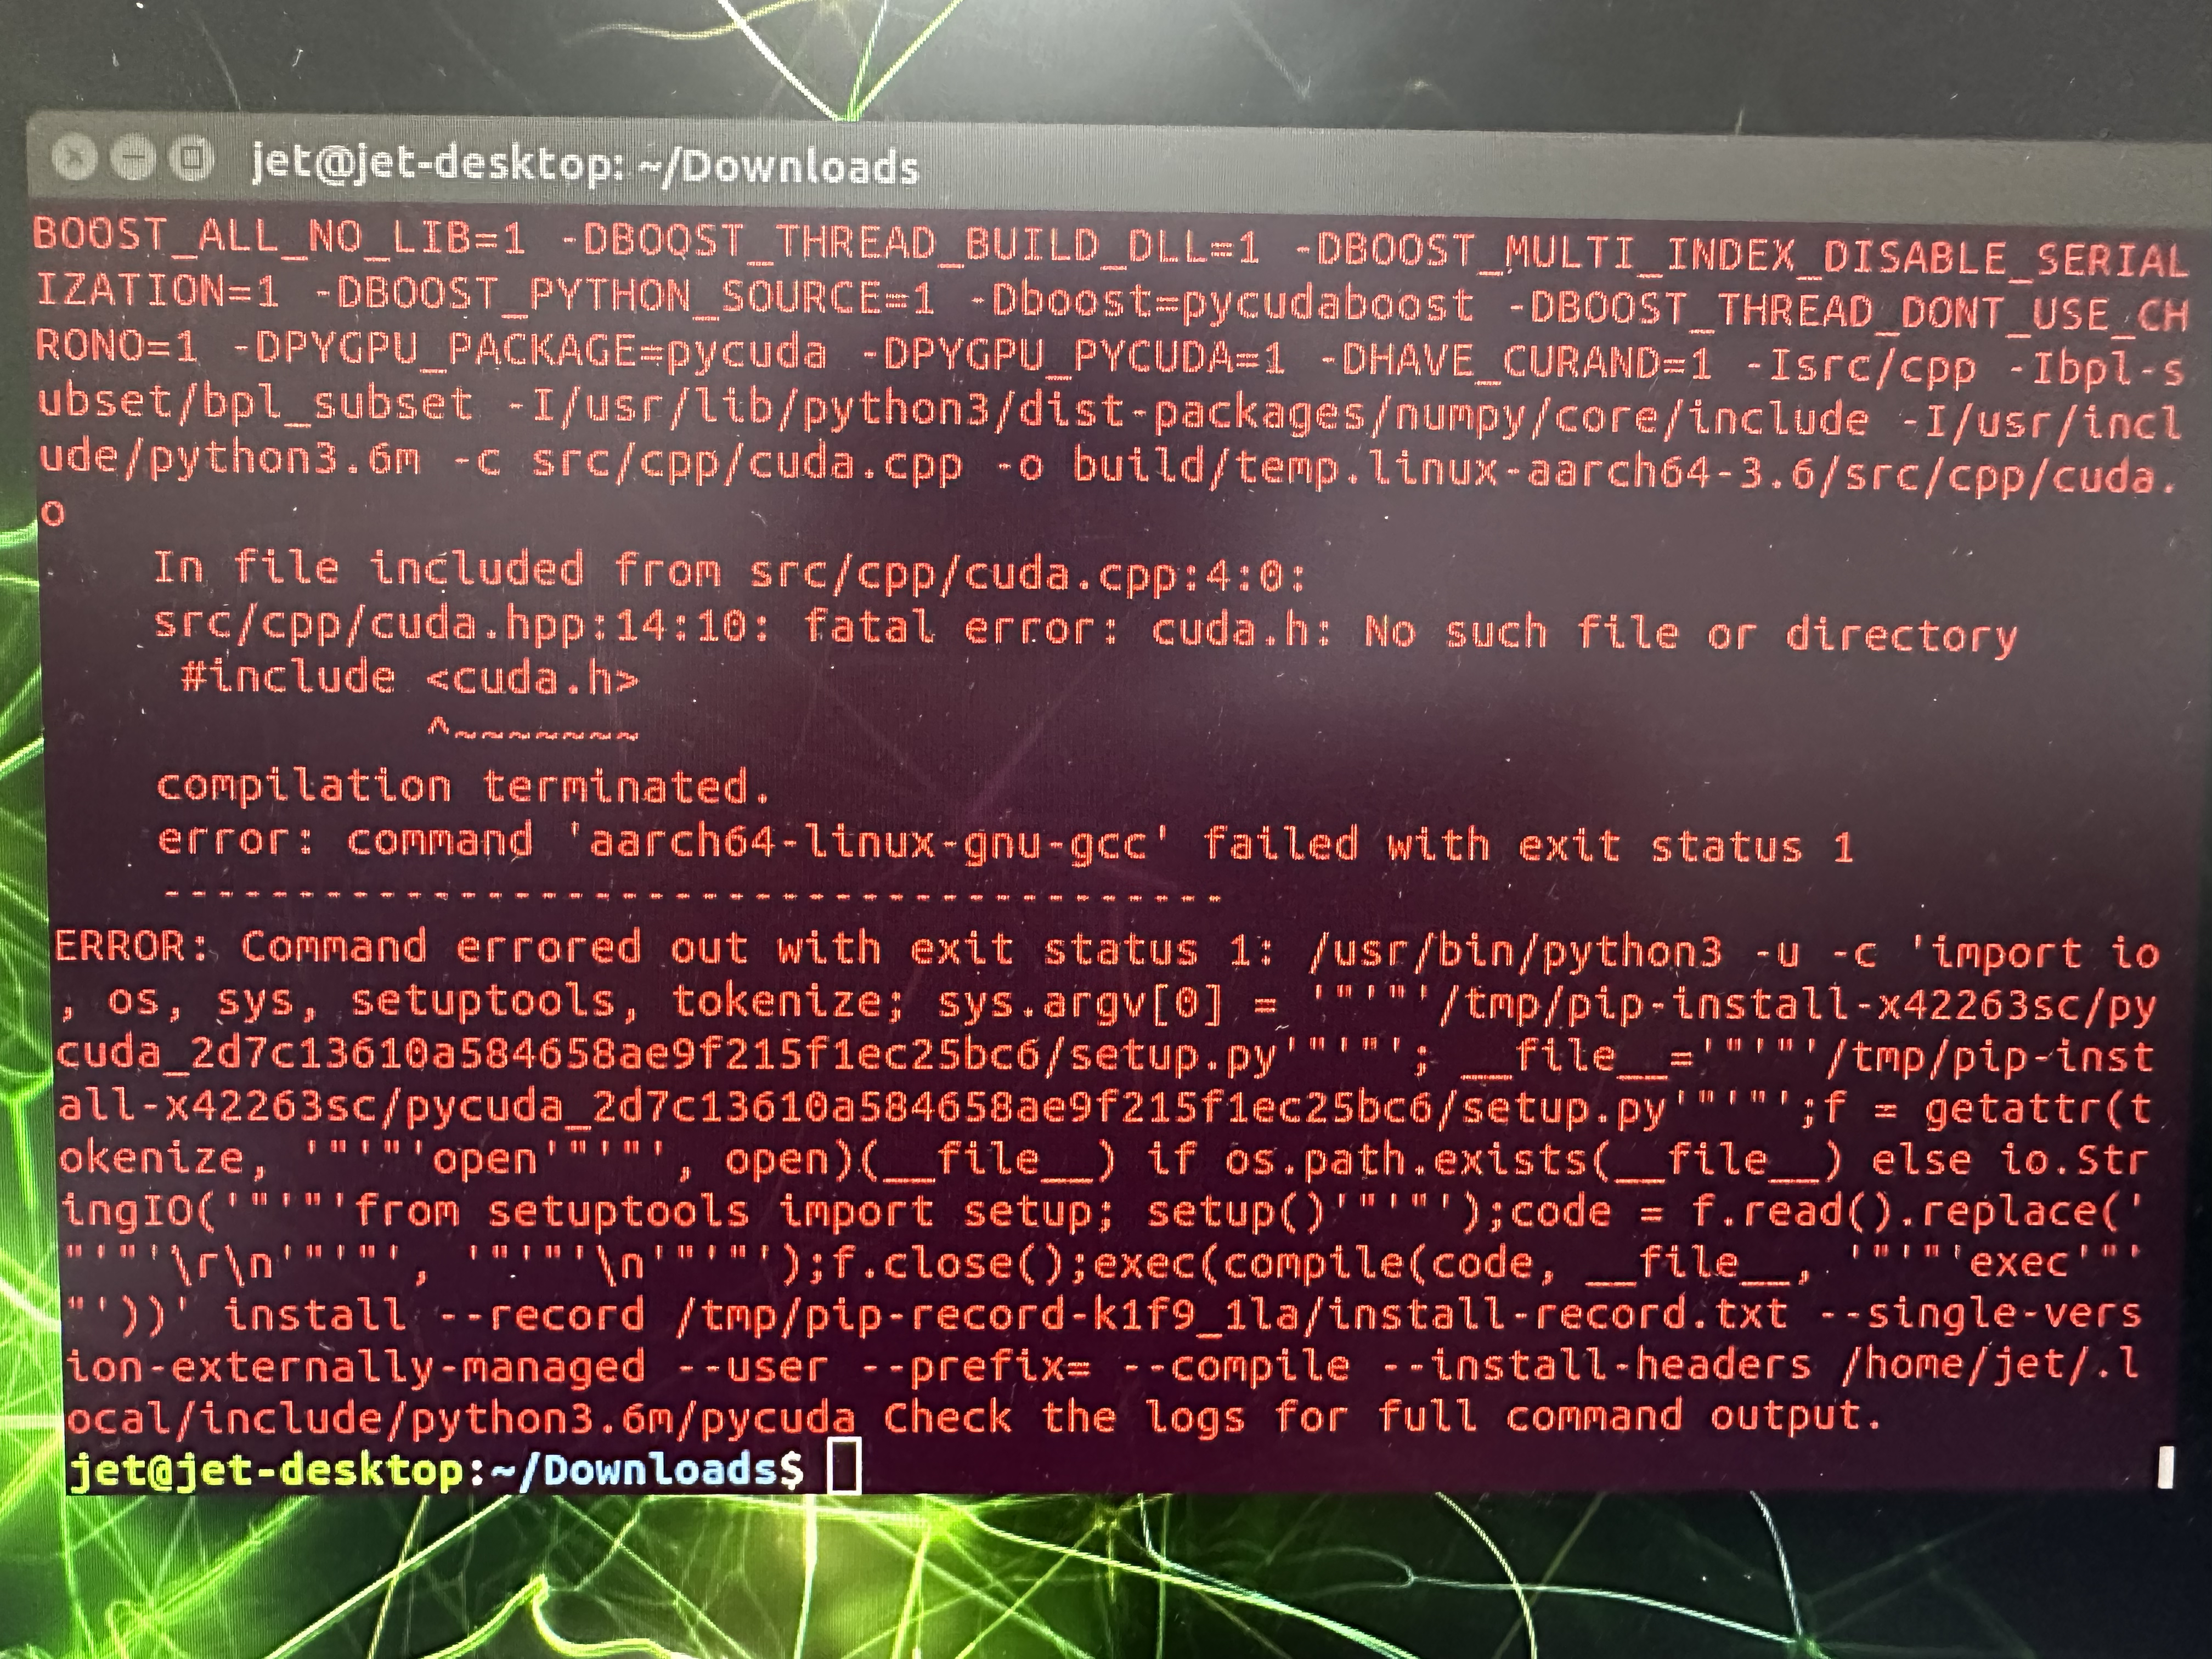
그리고 파이썬에서 CUDA를 사용하기 위해 PyCuda를 설치해야 한다.
주의! 환경변수 등록을 미리 하지않으면 pycuda설치시 아래 사진처럼 오류가 발생한다.
Error
cuda폴더와 cuda-설치버전의 위치를 확인한다.
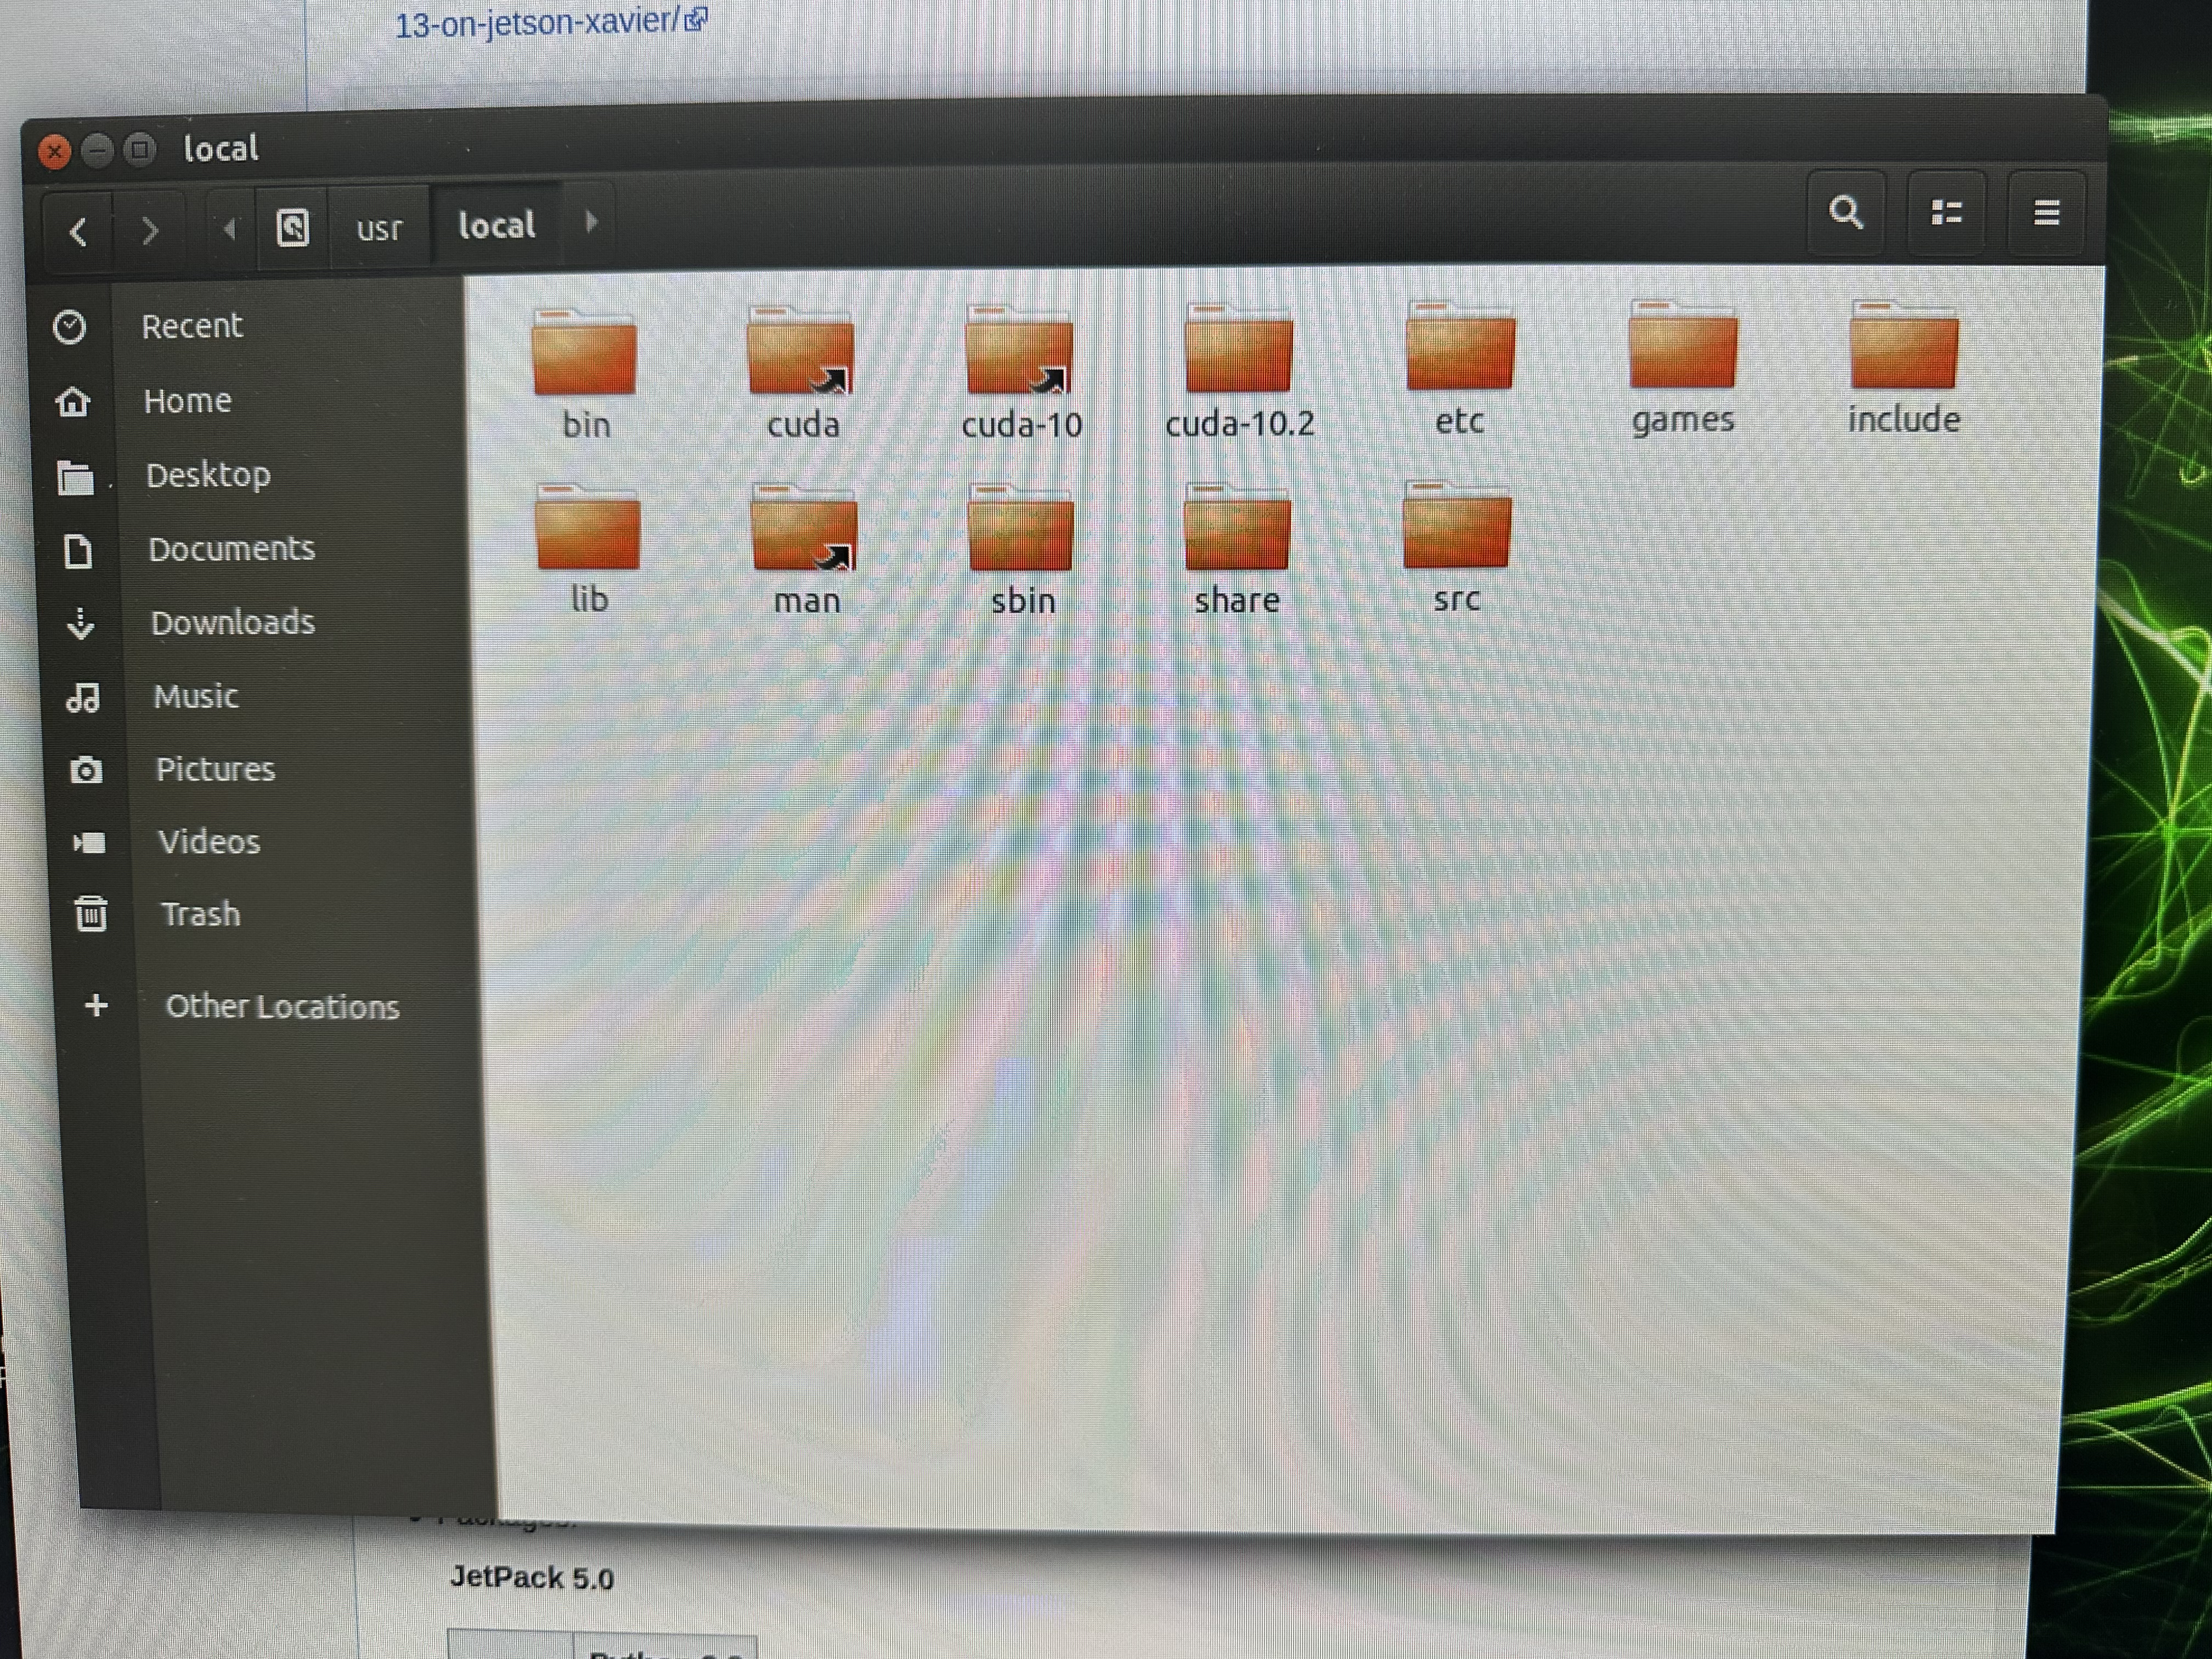
나의 경우는 cuda-10.2다. 아래 명령어를 입력하자
jet@jet-desktop:~$ vim ~/.bashrc맨 밑으로 가서 a를 눌러주고 아래 두 줄을 입력한다.
export PATH="/usr/local/cuda-10.2/bin:$PATH"
export LD_LIBRARY_PATH="/usr/local/cuda-10.2/lib64:$LD_LIBRARY_PATH"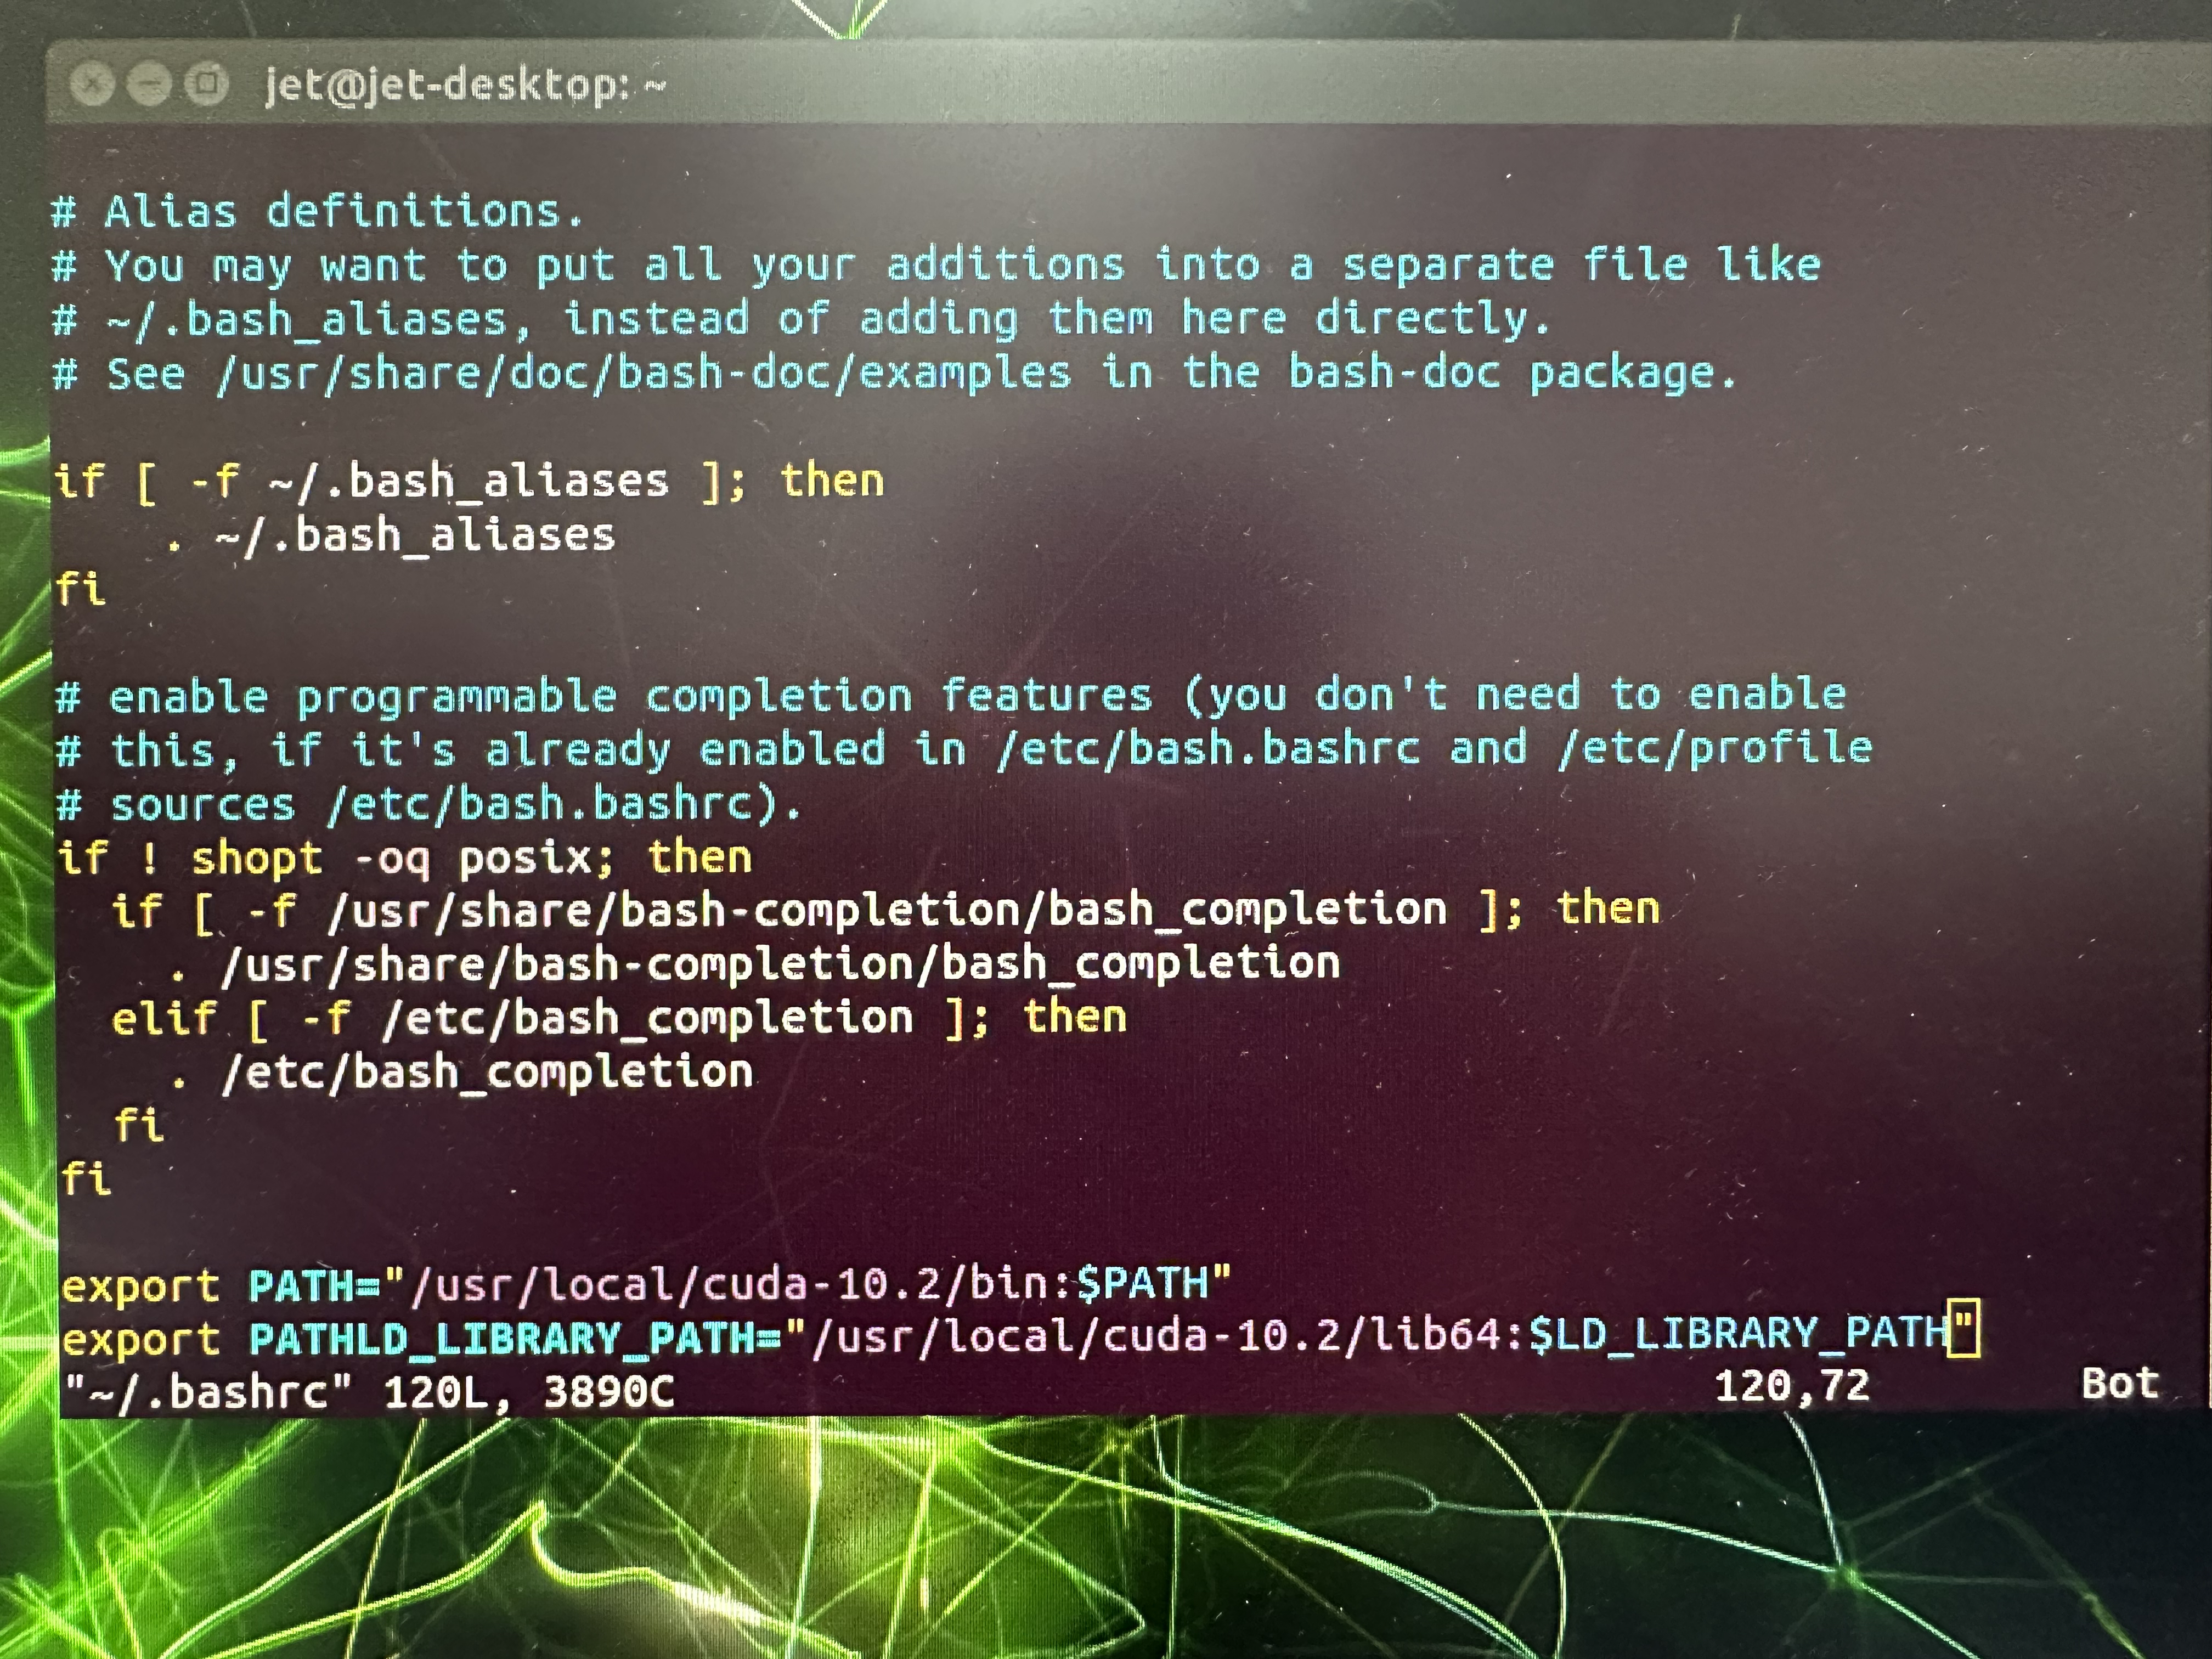
esc :wq! 로 저장하고 나오자. 환경변수 설정이 잘 되었는지 확인하기 위해 아래 명령어를 입력하자
jet@jet-desktop:~$ source ~/.bashrc
jet@jet-desktop:~$ nvcc --version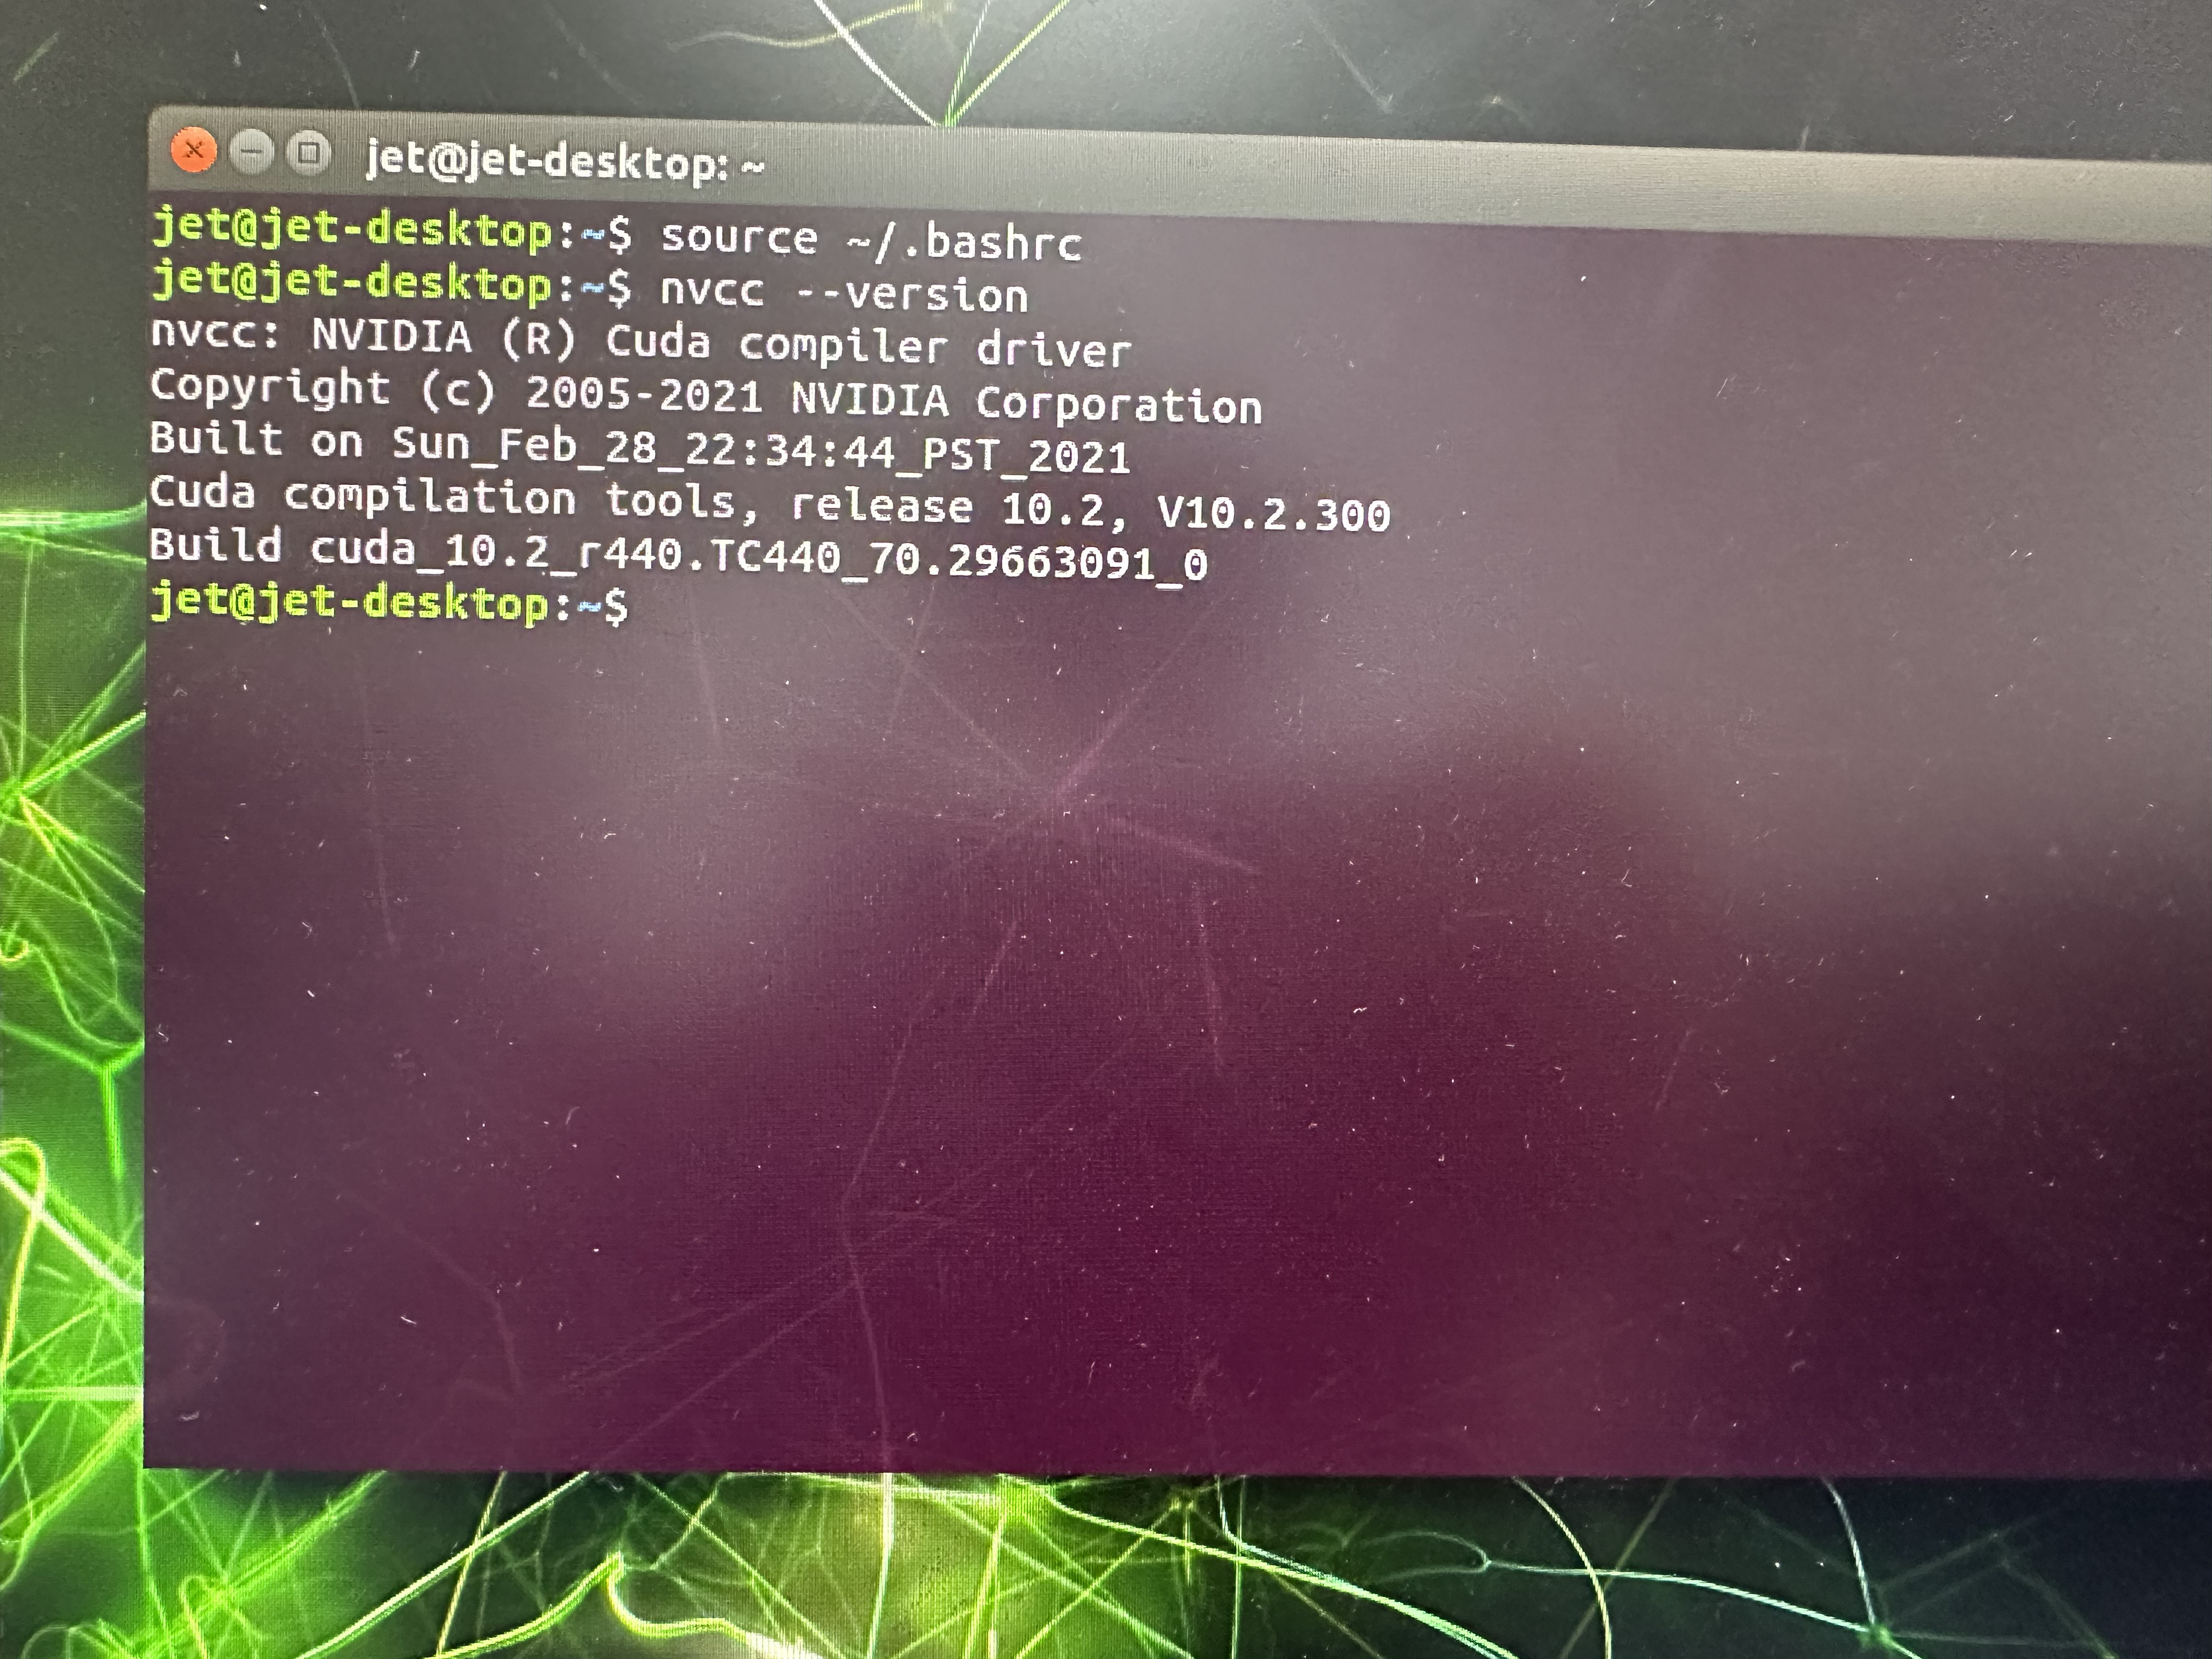
위와 같이 잘 나온다면 pycuda를 설치한다.
jet@jet-desktop:~$ python3 -m pip install pycuda그래도 에러가 난다면 아래 파일을 다운받고 아래 명령어로 직접 설치하면 설치가 될 것이다.
jet@jet-desktop:~$ cd Downloads
jet@jet-desktop:~$ tar -xvf pycuda-2019.1.2.tar.gz
jet@jet-desktop:~$ cd pycuda-2019.1.2
jet@jet-desktop:~$ python3 configure.py --cuda-root=/usr/local/cuda-10.2
jet@jet-desktop:~$ python3 setup.py install
4. TF Lite Inference
Jetson에서 TFlite 포멧의 모델을 돌려볼 수 있다. 하지만 CPU만 사용해 추론한다고 한다.
TFlite는 모바일용에 최적화된 포멧으로 Nvidia의 GPU(cuda)를 사용하지 않는다.
따라서 TFlite로 GPU를 할당해 추론하는 것은 불가능하다.
TF에서는 공식적으로 지원해주지 않지만 GPU delegates를 통해 가능하다고 한다. (성능이 CPU보다 약간 떨어진다고 한다.)
TensorFlow Lite would never meet a CUDA GPU. Hence, it does not support CUDA or cuDNN. The final performance is a bit less than using the quad-core CPU alone. It probably has to do with the fact that TensorFlow Lite actually transfers all calculations to the GPU. There is no balanced mix between GPU and CPU, as found in ncnn, MNN or Paddle Lite. There are even certain operations the GPU delegate can't execute. For instance, an operation like Concatenation or Logistic found in MobileNetV1.
https://qengineering.eu/install-tensorflow-2-lite-on-jetson-nano.html
TF Lite Inference 코드
Code
#code 5. About TensorRT
TensorRT는 Nvidia GPU를 사용해 딥러닝 모델을 추론하는 과정에서 대기시간을 최소화하고 처리량을 극대화 할 수 있도록 도와주는 framework.
TRT(TensorRT)와 TF-TRT(Tensorflow+ TensorRT)를 구분하자.
TRT는 모델을 TRT로 변환하는 과정에서 모든 레이어를 최적화 해야만 Output을 내며 TF-TRT는 최적화 할 수 있는 부분만 부분적으로 최적화한다.
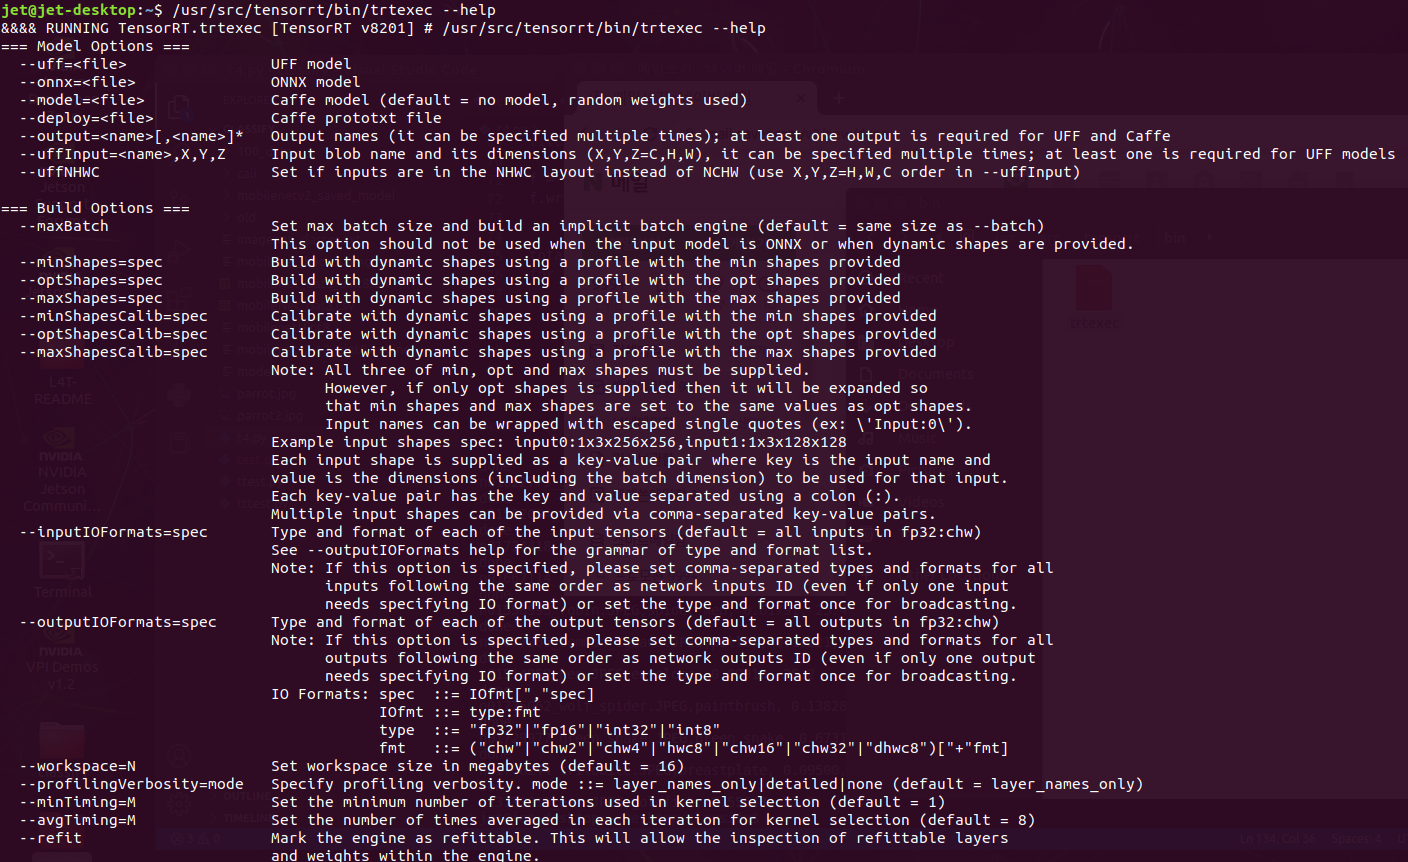
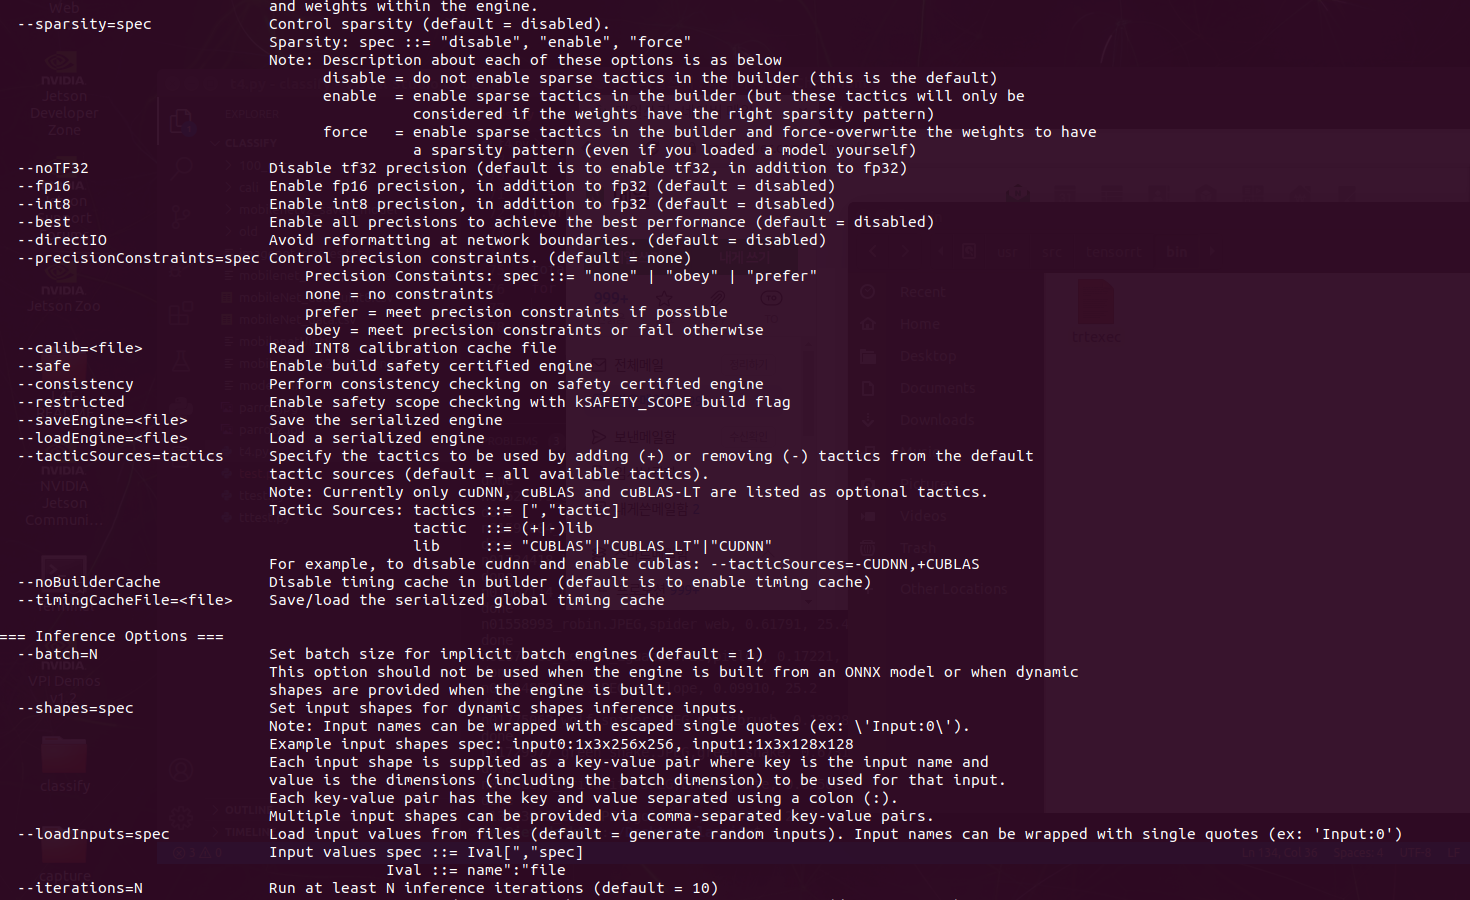
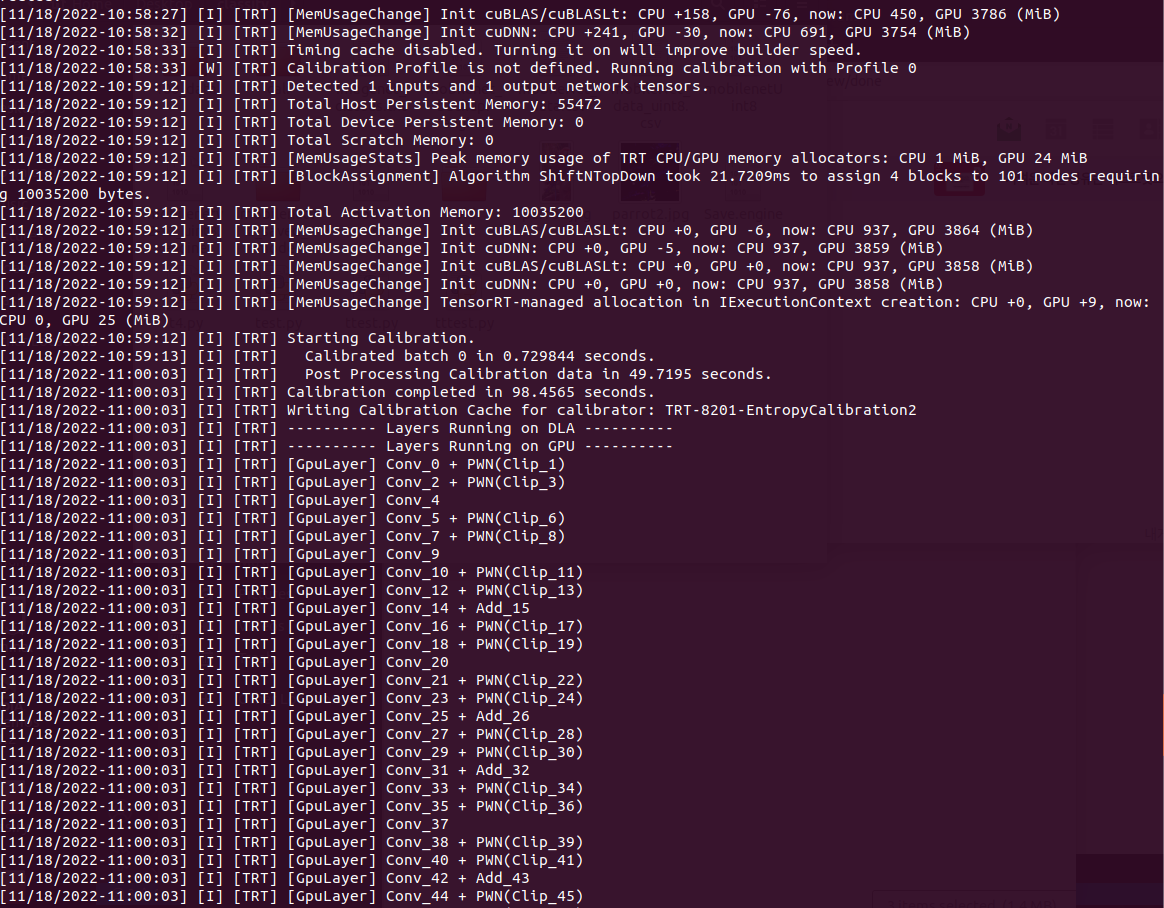
6. Convert to TensorRT
ONNX, UFF, Caffe Model을 trtexec를 사용해 TRT로 변환이 가능하며 나는 ONNX를 사용했다.
사용한 모델 : MoibleNetV2-12.ONNX
Quantization : int8
PASSED가 뜨면 모든 정상적으로 잘 변환이 됐다는 뜻이다.
변환할 때 옵션을 참고하자
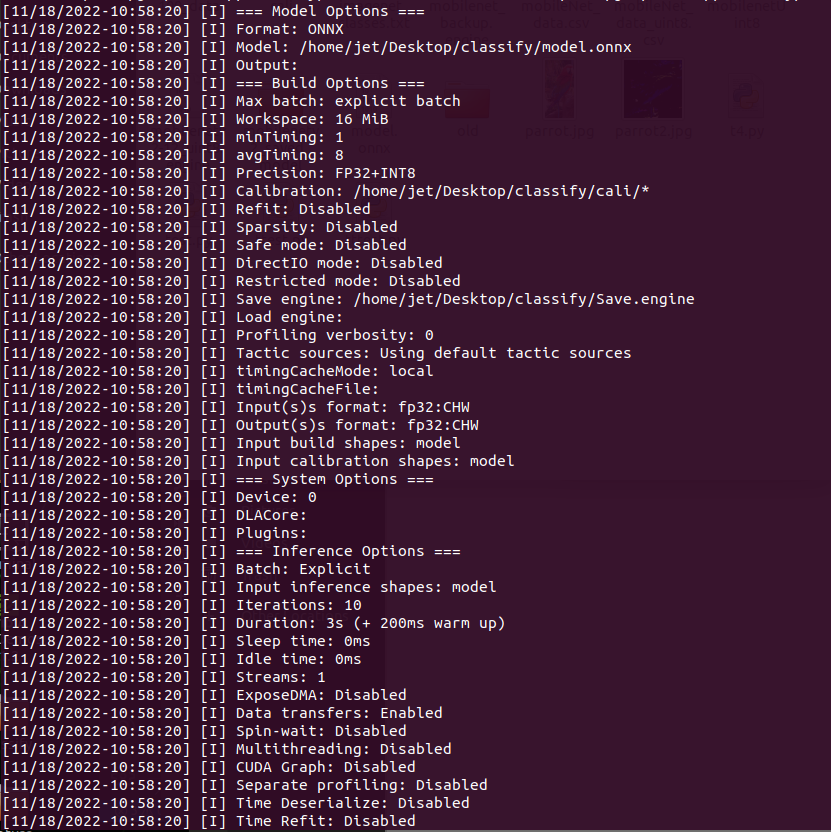
$ /usr/src/tensorrt/bin/trtexec --saveEngine=/home/(user_name)/Desktop/(folder_name)/mobilenetv2-12_uint8.engine --onnx=/home/(user_name)/Desktop/(folder_name)/model.onnx --int8 --calib=/home/(user_name)/Desktop/(folder_name)/cali/*
또는
$./trtexec --saveEngine=/home/(user_name)/Desktop/(folder_name)/mobilenetv2-12_uint8.engine --onnx=/home/(user_name)/Desktop/(folder_name)/model.onnx --int8 --calib=/home/(user_name)/Desktop/(folder_name)/cali/*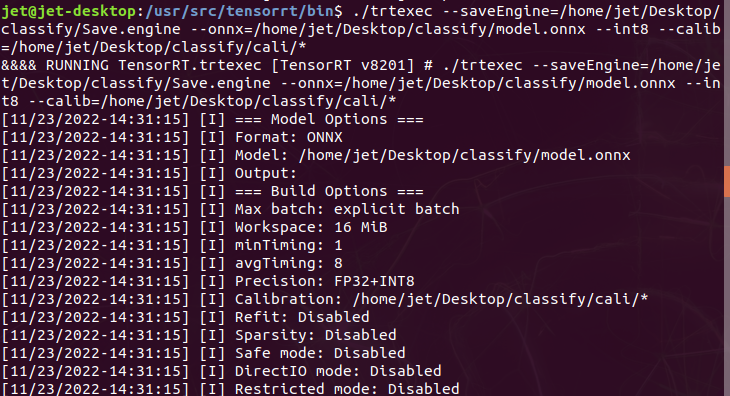
OPTION
RESULT


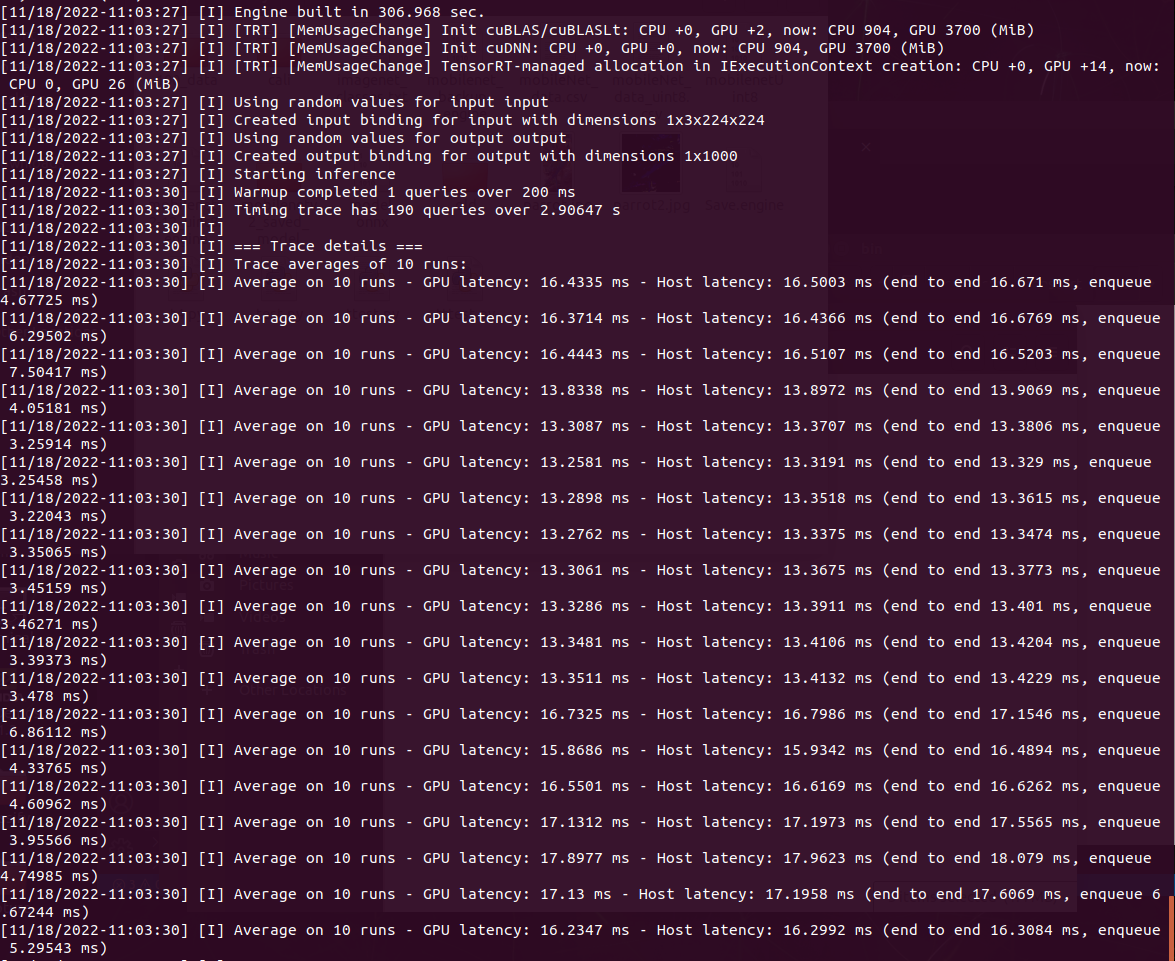
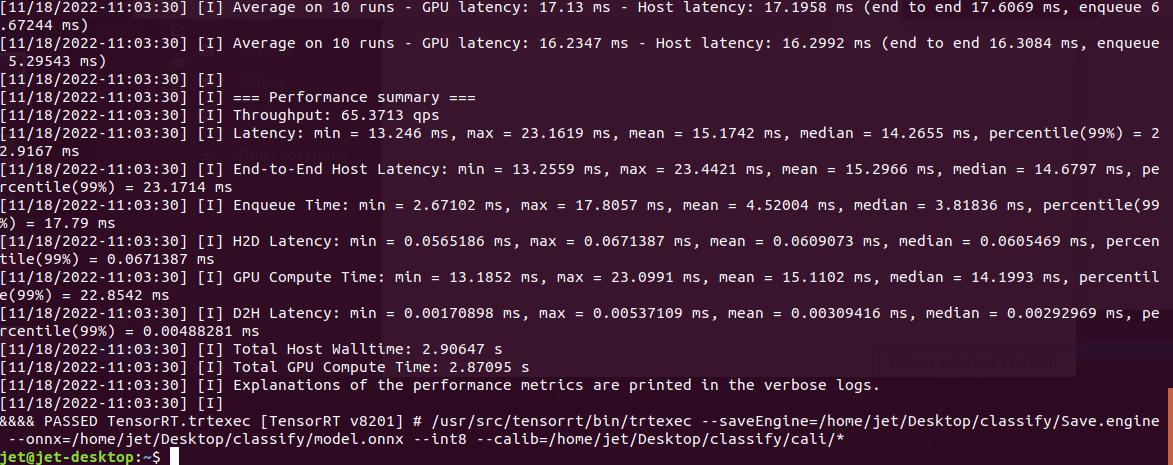
7. TensorRT Inference
아래 두 코드는 MobileNetV2-12.ONNX → TRT포멧으로 변경하고 Inference하는 코드다.
MoibleNetV2의 이미지 전처리는 아래 Pytorch 홈페이지에서 확인해 OpenCV로 구현했다.
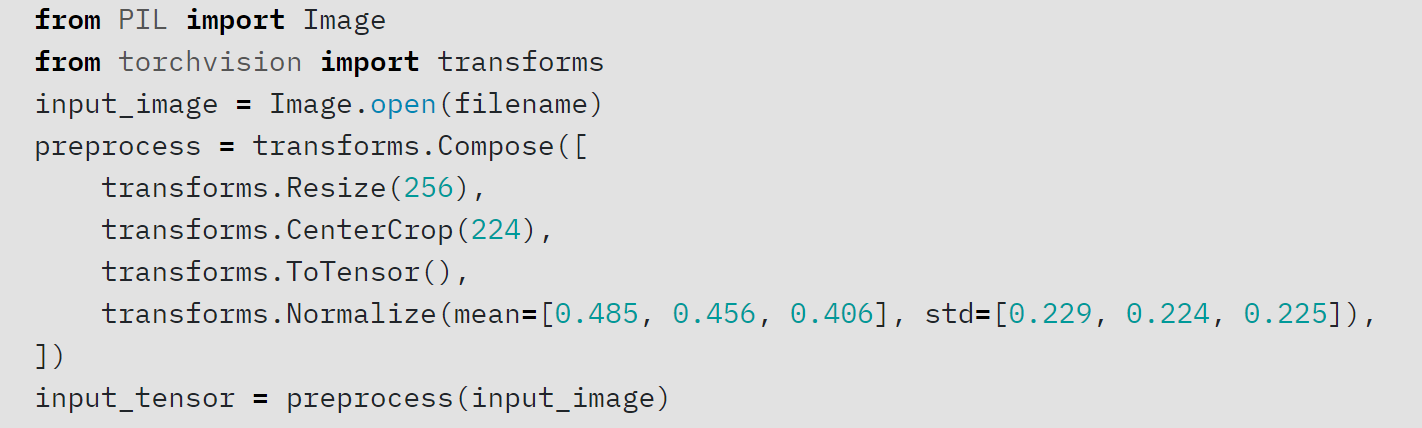
https://pytorch.org/hub/pytorch_vision_mobilenet_v2/
Image, label, ImageNet Data set 113 class을 다운받자
아래 블로그를 참조했으며 코드상 몇 가지 오류사항들이 있어서 수정, 보안했다.
저장한 TensorRT 파일을 읽어오기
import tensorrt as trt
import pycuda.driver as cuda

file_name = "your.engine" # your TRT File
TRT_LOGGER = trt.Logger(trt.Logger.WARNING)
trt_runtime = trt.Runtime(TRT_LOGGER)

with open(file_name, 'rb') as f :
    engine_data = f.read()
engine = trt_runtime.deserialize_cuda_engine(engine_data)
TensorRT의 Engine로부터 Stream으로 묶고 GPU에 할당하기
class HostDeviceMem(object) :
    def __init__(self, host_mem, device_mem) :
        self.host = host_mem
        self.device = device_mem

    def __str__(self) :
        return "Host:\n"+str(self.host)+"\nDevice:\n"+str(self.device)


    def __repr__(self) :
        return self.__str__()

inputs, outputs, bindings, stream = [] , [], [], []

for binding in engine :
    size = trt.volume(engine.get_binding_shape(binding))*engine.max_batch_size
    dtype = trt.nptype(engine.get_binding_dtype(binding))

    host_mem = cuda.pagelocked_empty(size, dtype)  #allocate host and device buffers
    device_mem = cuda.mem_alloc(host_mem.nbytes)
    bindings.append(int(device_mem))  #Append the device buffer to device bindings.
    if engine.binding_is_input(binding) :  #Append to the appropriate list.
        inputs.append(HostDeviceMem(host_mem, device_mem))
    else :
        outputs.append(HostDeviceMem(host_mem, device_mem))

context = engine.create_execution_context()
Input을 TensorRT가 읽을 수 있는 데이터로 변환 후 넣어준다
input_data = np.zeros(shape=(1, 3, 224, 224), dtype=np.float32) # dummpy input

numpy_array_input = [input_data]
hosts = [input.host for input in inputs]
trt_types = [trt.int32]

for numpy_array, host, trt_types in zip(numpy_array_input, hosts, trt_types) :
    numpy_array = np.asarray(numpy_array).astype(trt.nptype(trt_types)).ravel()
    np.copyto(host, numpy_array)
Inference
def do_inference(context, bindings, inputs, outputs, stream):
    [cuda.memcpy_htod_async(inp.device, inp.host, stream) for inp in inputs]
    context.execute_async_v2(bindings=bindings, stream_handle=stream.handle)
    [cuda.memcpy_dtoh_async(out.host, out.device, stream) for out in outputs]
    stream.synchronize()
    return [out.host for out in outputs]

trt_outputs = do_inference(
    context=context,
    bindings=bindings,
    inputs=inputs,
    outputs=outputs,
    stream=cuda.Stream()
)

print(trt_outputs[0])- 전체 코드
단일 이미지 Inference Code
import cv2
import numpy as np
import tensorrt as trt
import pycuda.driver as cuda
import pycuda.autoinit
import time

file_name = "your.engine" # your TRT File
TRT_LOGGER = trt.Logger(trt.Logger.WARNING)
trt_runtime = trt.Runtime(TRT_LOGGER)

with open(file_name, 'rb') as f :
    engine_data = f.read()

engine = trt_runtime.deserialize_cuda_engine(engine_data)

class HostDeviceMem(object) :
    def __init__(self, host_mem, device_mem) :
        self.host = host_mem
        self.device = device_mem

    def __str__(self) :
        return "Host:\n"+str(self.host)+"\nDevice:\n"+str(self.device)


    def __repr__(self) :
        return self.__str__()

inputs, outputs, bindings, stream = [] , [], [], []

for binding in engine :
    size = trt.volume(engine.get_binding_shape(binding))*engine.max_batch_size
    dtype = trt.nptype(engine.get_binding_dtype(binding))
    host_mem = cuda.pagelocked_empty(size, dtype)  #allocate host and device buffers.
    device_mem = cuda.mem_alloc(host_mem.nbytes)  #Append the device buffer to device bindings.
    bindings.append(int(device_mem))  #Append to the appropriate list.
    if engine.binding_is_input(binding) :
        inputs.append(HostDeviceMem(host_mem, device_mem))
    else :
        outputs.append(HostDeviceMem(host_mem, device_mem))

context = engine.create_execution_context()

with open("imagenet_classes.txt", "r") as f :
    categories = [s.strip() for s in f.readlines()]

#input_data = np.zeros(shape=(1, 3, 224, 224), dtype=np.float32) # dummpy input

img_path = "./parrot.jpg"
input_data = cv2.imread(img_path, cv2.IMREAD_COLOR)
input_data = cv2.cvtColor(input_data, cv2.COLOR_BGR2RGB)
input_data = cv2.resize(input_data, (256, 256), interpolation=cv2.INTER_AREA).astype(np.float32)
input_data = input_data[16:240, 16:240, :].copy() # 224, 224, 3

input_data = input_data.transpose([2, 0, 1])
mean = np.array([0.079, 0.005, 0]) + 0.406 # RGB
std = np.array([0.005, 0, 0.001]) + 0.224

for channel in range(input_data.shape[0]) :
    input_data[channel, :, :] = (input_data[channel,:,:]/255 - mean[channel]) / std[channel]

input_data = np.expand_dims(input_data, axis=0) # 1, 3, 224, 224

numpy_array_input = [input_data]

hosts = [input.host for input in inputs]
trt_types = [trt.int32]

for numpy_array, host, trt_types in zip(numpy_array_input, hosts, trt_types) :
    numpy_array = np.asarray(numpy_array).astype(trt.nptype(trt_types)).ravel()
    np.copyto(host, numpy_array)


def do_inference(context, bindings, inputs, outputs, stream):
    [cuda.memcpy_htod_async(inp.device, inp.host, stream) for inp in inputs]
    context.execute_async_v2(bindings=bindings, stream_handle=stream.handle)
    [cuda.memcpy_dtoh_async(out.host, out.device, stream) for out in outputs]
    stream.synchronize()
    return [out.host for out in outputs]

def softmax(x) :
    e_x = np.exp(x-np.max(x))
    return e_x / e_x.sum()

start = time.perf_counter()
trt_outputs = do_inference(
    context=context,
    bindings=bindings,
    inputs=inputs,
    outputs=outputs,
    stream=cuda.Stream()
)
end = time.perf_counter()

print("done")

infer_time = (end - start)*1000 #ms

trt_outputs_softmax = softmax(trt_outputs[0])
top1 = np.argmax(trt_outputs_softmax)

result = categories[top1]
score = trt_outputs_softmax[top1]

print(f"{img_path},{result}, {score:.5f}, {infer_time:.1f}")
다수 이미지 Inference Code
import cv2
import numpy as np
import tensorrt as trt
import pycuda.driver as cuda
import pycuda.autoinit
import os
import time

def softmax(x) :
    e_x = np.exp(x-np.max(x))
    return e_x / e_x.sum()

def do_inference(context, bindings, inputs, outputs, stream):
        [cuda.memcpy_htod_async(inp.device, inp.host, stream) for inp in inputs]
        context.execute_async_v2(bindings=bindings, stream_handle=stream.handle)
        [cuda.memcpy_dtoh_async(out.host, out.device, stream) for out in outputs]
        stream.synchronize()
        return [out.host for out in outputs]


file_name = "mobilenetv2-12_uint8.engine"
TRT_LOGGER = trt.Logger(trt.Logger.WARNING)
trt_runtime = trt.Runtime(TRT_LOGGER)

with open(file_name, 'rb') as f :
    engine_data = f.read()

engine = trt_runtime.deserialize_cuda_engine(engine_data)

class HostDeviceMem(object) :
    def __init__(self, host_mem, device_mem) :
        self.host = host_mem
        self.device = device_mem

    def __str__(self) :
        return "Host:\n"+str(self.host)+"\nDevice:\n"+str(self.device)


    def __repr__(self) :
        return self.__str__()

inputs, outputs, bindings, stream = [] , [], [], []

for binding in engine :
    size = trt.volume(engine.get_binding_shape(binding))*engine.max_batch_size
    dtype = trt.nptype(engine.get_binding_dtype(binding))
    #allocate host and device buffers
    host_mem = cuda.pagelocked_empty(size, dtype)
    device_mem = cuda.mem_alloc(host_mem.nbytes)

    # Append the device buffer to device bindings.
    bindings.append(int(device_mem))
    if engine.binding_is_input(binding) :
        inputs.append(HostDeviceMem(host_mem, device_mem))
    else :
        outputs.append(HostDeviceMem(host_mem, device_mem))

context = engine.create_execution_context()

with open("imagenet_classes.txt", "r") as f :
    categories = [s.strip() for s in f.readlines()]


file_path = "./113_data"

f = open("./mobileNet_data_uint8.csv","w")
f.write("imageName,class,score,inference_time\n")


total_image_list = []
for roots, dirs, files in os.walk(file_path) :
    for file in files :
        file_path = os.path.join(roots, file)
        total_image_list.append(file_path)


for img_path in total_image_list :

    input_data = cv2.imread(img_path, cv2.IMREAD_COLOR)
    input_data = cv2.cvtColor(input_data, cv2.COLOR_BGR2RGB)
    input_data = cv2.resize(input_data, (256, 256), interpolation=cv2.INTER_AREA).astype(np.float32)

    input_data = input_data[16:240, 16:240, :].copy()

    input_data = input_data.transpose([2, 0, 1])
    mean = np.array([0.079, 0.005, 0]) + 0.406 # RGB
    std = np.array([0.005, 0, 0.001]) + 0.224

    for channel in range(input_data.shape[0]) :
        input_data[channel, :, :] = (input_data[channel,:,:]/255 - mean[channel]) / std[channel]


    input_data = np.expand_dims(input_data, axis=0) # 1, 3, 224, 224

    numpy_array_input = [input_data]

    hosts = [input.host for input in inputs]
    trt_types = [trt.int32]

    for numpy_array, host, trt_types in zip(numpy_array_input, hosts, trt_types) :
        numpy_array = np.asarray(numpy_array).astype(trt.nptype(trt_types)).ravel()
        np.copyto(host, numpy_array)

    start = time.perf_counter()
    trt_outputs = do_inference(
        context=context,
        bindings=bindings,
        inputs=inputs,
        outputs=outputs,
        stream=cuda.Stream()
    )
    end = time.perf_counter()

    print("Done")

    ori = trt_outputs
    trt_outputs_softmax = softmax(trt_outputs[0])

    top1 = np.argmax(trt_outputs_softmax)

    result = categories[top1]
    score = trt_outputs_softmax[top1]
    infer_time = (end - start)*1000 #ms
    img_name = img_path.split("/")[-1]
    print(f"{img_name},{result}, {score:.5f}, {infer_time:.1f}")
    f.write(f"{img_name},{result},{score:.5f},{infer_time:.1f}ms\n")


f.close()
reference : https://blog.si-analytics.ai/33
8. Model Evaluate
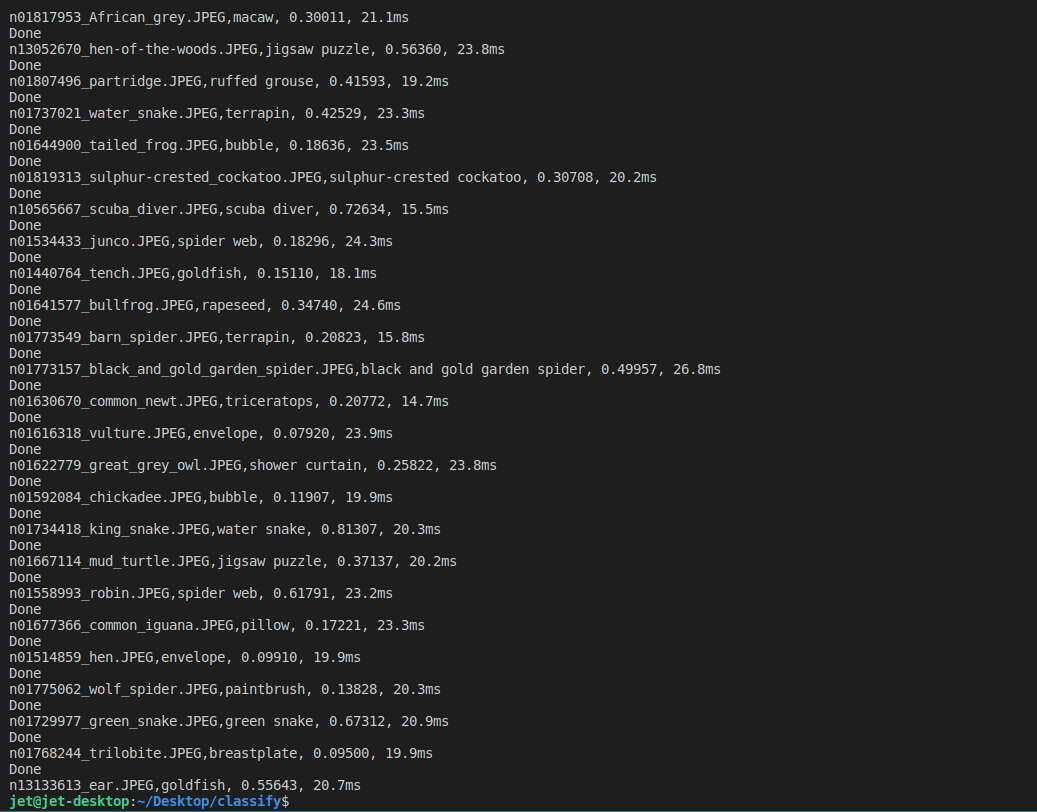
아래는 다수의 이미지로 Inference한 결과 데이터다.
처음 Engine이 올라갈 때 시간이 걸리는 부분을 제외하고 100개만 산출했다. (ImageName, Class, Score, Inference_time)
113개의 Inference에 대한 평균 22.09ms 확인했다.
Comment